Archives for General Photography category
The official dictionary definition of reciprocal is “something that is equivalent to something else; counterpart; complement.” Reciprocity is a form of the word reciprocal and means “a relation of mutual dependence, action or influence.”
If you think of it in terms of a relationship it is a bit easier to understand. Here is reciprocity used in a sentence to help:
The two companies have a relationship based on reciprocity as they joined together to fight their multi-million dollar competitor.
So how do we translate that to photography? Rather simply actually. In photography reciprocity refers to the relationship between the aperture (f-stop) and shutter speed. Each f-stop has a corresponding or reciprocal shutter speed that will result in a correctly exposed image. Essentially, the smaller the aperture opening (larger the f-number) the longer the shutter speed needs to be to get the optimal amount of light to the film or digital sensor. Conversely, the larger the aperture (smaller the f-number) the shorter the shutter speed needs to be. Simply put, as one goes down the other goes up, they are inversely related. The chart below demonstrates this relationship between aperture and shutter speed. As your aperture moves closer to the “large opening” end your shutter speed will move towards the “short exposure” end. As your aperture moves closer to the “small opening” end, your shutter speed will move towards the “long exposure” end.

The reciprocal part of the relationship means that in order to maintain an accurate exposure, for each stop up or down you make in aperture (each change you make in f-stop) you need to make an equal number of stop changes for shutter speed and vice versa.
You may have heard of the term reciprocity failure as well. This is a term related to film photography and occurs when the film fails to expose correctly with very long or very short shutter speeds. This is because film is designed to work within specified shutter speeds. The result of reciprocity failure is an incorrectly exposed image. In digital photography however, reciprocity failure is not an issue. The digital sensor in DSLR cameras does not have the same limitations of film so you can focus on the reciprocal relationship of the aperture to the shutter speed.
Can cell phone photography be considered real photography? In a word, sometimes. To start we need to define the difference between a “photograph” and just another “snapshot.” In my opinion, a picture becomes a photograph when there is deliberate thought behind it. Similar to the point where murder becomes first degree murder. It is premeditated. Premeditating a photograph has much less to do with the camera than the photographer.
There are times when a picture taken with the most advanced DSLR is just a snap shot. If all I do is quickly point and shoot on full automatic mode I can turn any camera into a point-and-shoot. Conversely, if I take the time to compose and think about my subject, finding the best angle, light and composition, then I can create a photograph with any camera. It has less to do with all the advanced features of the camera (although these features can be a tool for the photographer to use for improving the quality of the photograph) and more to do with technique.
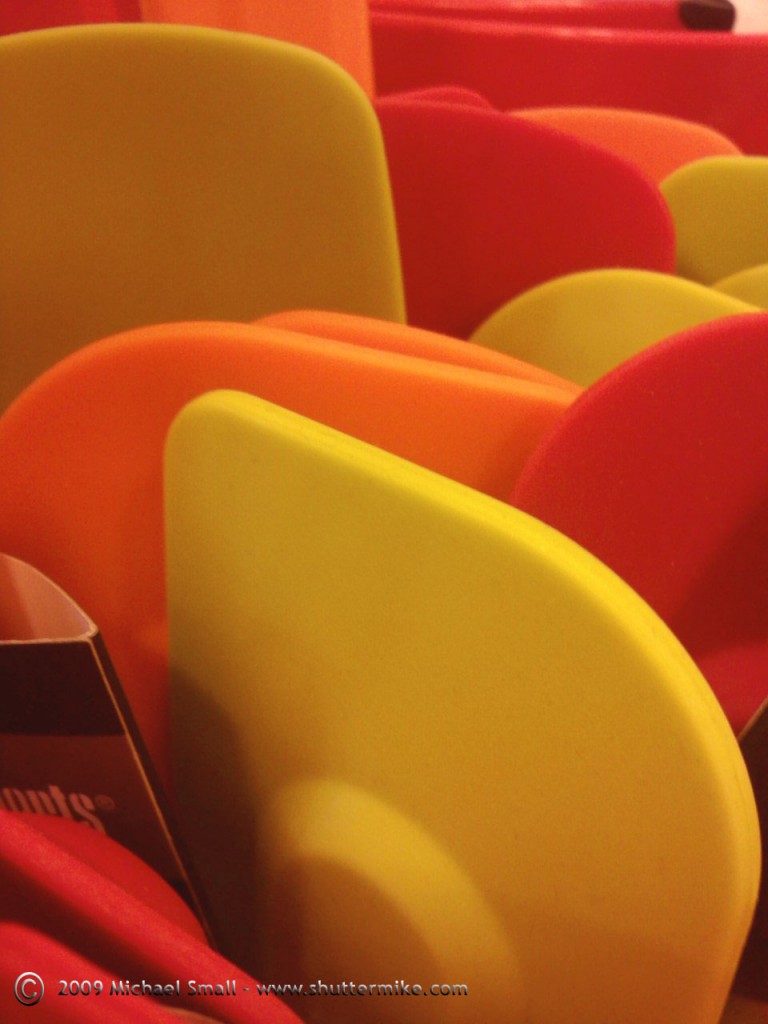
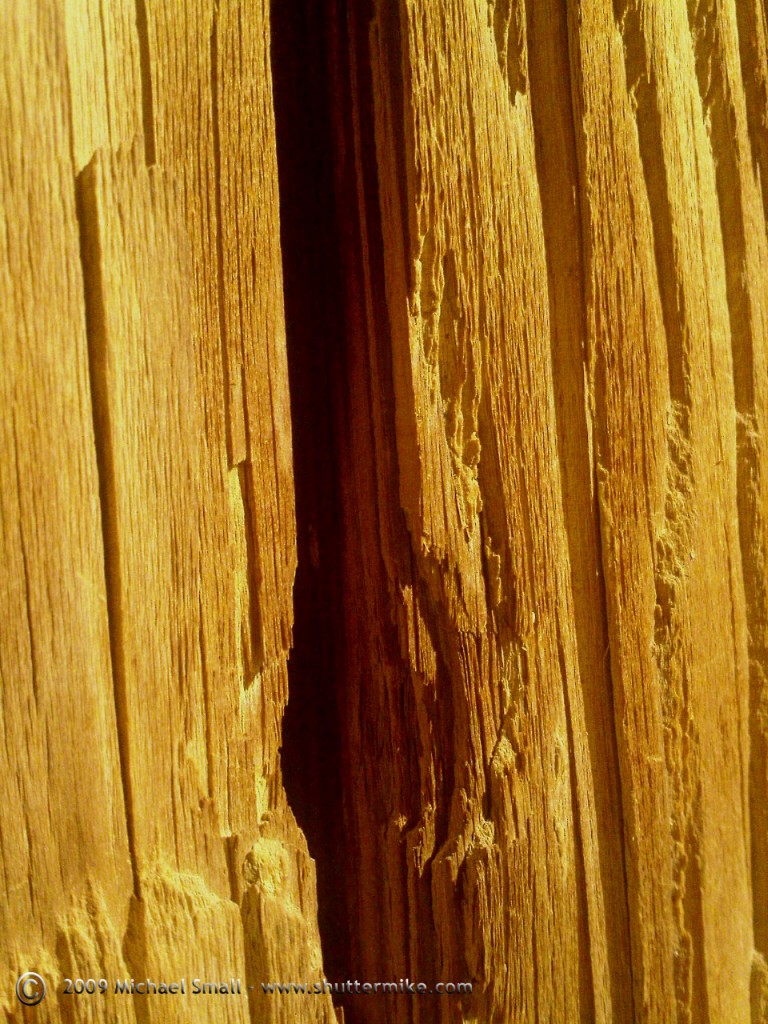
These photographs were taken with my cell phone camera. The white balance settings and ISO options up to 400 as well as 5 scene modes make it possible to compose some decent photographs with a cell phone camera. Due to resolution limitations the end quality of the image is not going to be as good as with a full size camera. But for on the fly shooting you can use your photographer’s skills through a cell phone camera lens just as much as you can through your DSLR and create photography.
These photos were for a project I did on color. They represent several of the concepts I wrote about in the post 5 Ways to Use Color in Your Photography, including complimentary and analogous.

Lemons and Avacados
Analogous colors of green and yellow
f/5.6 – 1/160 sec – ISO 200 – Focal Length 55 mm

Fall Gourds and Pumpkins
Complimentary Colors of orange and blue
f/5.6 – 1/160 sec – ISO 200 – Focal Length 60 mm
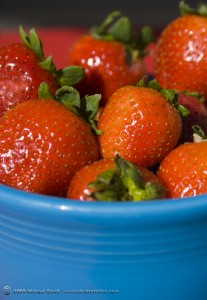
Strawberries in a Bowl
Complimentary Colors of red and cyan
f/8 – 1/400 sec – ISO 100 – Focal Length 50 mm

Lemons on Blue
Complimentary Colors of blue and yellow
f/16 – 0.4 sec – ISO 400 – Focal Length 70 mm
 For this post, when I talk about color in photography I am not talking about using color film vs black and white film (or changing a digital setting to black and white). Although the choice between shooting in color or black and white can be a critical one, this post is about using color to enhance your composition and even as the subject of your photograph. For many amateur photographers we don’t often think about the mechanics of color when shooting, but all those technical details can really help make or break an image.
First things first, you probably remember the color wheel from your art classes in elementary school. The color wheel is the basis of how colors relate to one another. The official definition (via Wikipedia) is:
An abstract illustrative organization of color hues around a circle, showing relationships between colors considered to be primary colors,secondary colors, complementary colors, etc.
Keeping the color wheel in mind there is a lot you can do with the composition and subject of your photographs. Here are 5 ways to experiment with color next time you are shooting.
1. Monochromatic
 In a monochromatic image one color is used in varying degrees of saturation (the intensity of a color) and lightness, or shade. This results in several contrasting shades of the same color in your photograph. Look for a scene with one central color, blue for example. Factors such as the lighting can influence the shade of that color and make for a more interesting image. Avoid the obvious such as a photograph of the sidewalk. Yes, that will result in a monochromatic photo, but the excessive lack of contrast can make for a boring photograph. Using some creativity and your photographer’s eye you are sure to find a subject with varying shades of one color that make the photo both monochromatic and interesting.
2. Analogous
 Analogous refers to two or more colors that are next to each other on the color wheel. Yellow and yellow-green for example. One color tends to be the dominant color in the image while the other(s) are used to enrich the overall image. An analogous photograph is similar to the monochromatic one, but offers more variation in color and tone. If you take your time you can find analogous subjects to photograph in both nature or the man-made environment. You could also set up your own scene and experiment with different analogous color schemes.
3. Complimentary
 Colors that compliment each other are opposite each other on the color wheel. Red and green or violet and yellow for example. When colors are opposite each other they are thought to be in balance when they appear together. The intensity of each color is also increased when complimentary colors appear next to each other. This is referred to as simultaneous contrast. You can easily set up a scene to capture complimentary colors by gathering some objects and arranging them together for your photograph. Or challenge yourself and head out to find complimentary colors in your everyday environment.
4. Color and Light
The source of the light you are shooting in can have a dramatic impact on how color is perceived. The intensity of sunlight, for example, differs by hour of the day and time of year. Early morning and late afternoon light is much warmer (red) than midday light which is cooler (blue). Shooting the same subject in varying natural light will impact the colors of that subject. Other lighting sources, such as shade, florescent and tungsten bulbs and even flash can all result in the same color appearing very different in your photograph.
A great way to get a feel for the impact different light sources can have on your subject is take one (portable) solid colored subject and photograph it in varying light sources. Shoot it in the morning and again at midday and at sunset. Then move it indoors and shoot under regular household light (usually tungsten). The tone and intensity of the color will vary, sometimes greatly, depending on your light source.
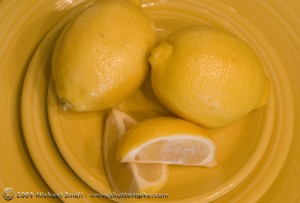

Top – Tungsten Light Source Bottom – Sunlight at Mid-Afternoon Light Source
5. Color as the Subject
 Once you have an understanding of the color wheel and the various ways in which colors relate to each other you can step your photography up a notch and try getting artsy. One possibility is to use color itself as the subject of your photograph. Although there can still be a physical object in the photograph,work with the color itself making it the primary focus of the photograph. Use different tones, light intensities and complimentary, monochrome and analogous colors to create the image and see what you come up with.
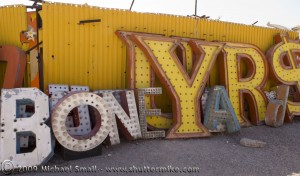
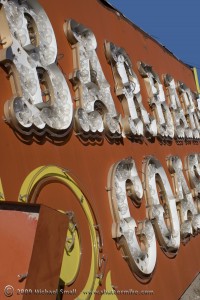 There is a museum in Las Vegas that ironically is all about the glitter that is Vegas yet is itself rather subdued. No flashing neon arrows pointing to its displays, no prominent location on The Strip, nor will you even be able to find out its location too easily. The Neon Museum in Las Vegas is a bit clandestine. You will only be told its exact location after you have a confirmed reservation. There are no self guided tours of its exhibits and no one gets in without a reservation, usually made months in advance.
All the secrecy makes the experience seem a bit more special. Like you are a part of a secret club. The Las Vegas Neon Museum houses, preserves, and eventually restores what has made Vegas famous. Its neon signs. Restored signs are displayed on and near Fremont St. while those that are waiting to shine again are stored in the museum’s boneyard. The tours offered by the museum are of their 3 acre boneyard and will set you back $15. But if you love Vegas, vintage signs, history, or just a unique experience this tour is well worth it.
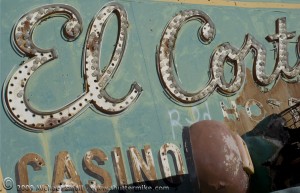 The signs are in various stages of repair or disrepair as the case may be. You are forewarned to wear close toed shoes as the boneyard is littered with broken light bulbs and rusted metal.
The museum is in the process of restoring the mid-century modern lobby of the La Concha Motel as their visitors center which was designed by Paul Revere Williams. A prominent icon such as the La Concha as a visitor center is sure to negate any secrecy that currently surrounds the museum.

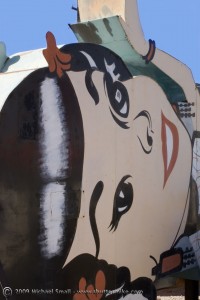
As you would imagine, hotel and casino signs dominate the collection of the Neon Museum. But not to be outdone in glitz and glamor everyday businesses went all out with their signs in Vegas as well. The one on the right above is from a Chinese restaurant.
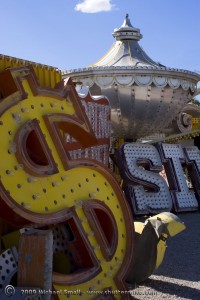
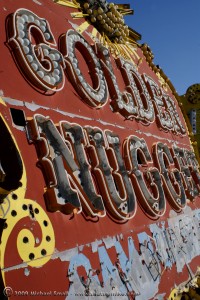
If Vegas did not coin the phrase, “keeping up with the Joneses” it does its best to keep it alive. The next best thing is always in the works. That means old hotels are continuously being imploded to clear the way for bigger, better and flashier. And those casinos that do survive need updated images every few years. So old signs come down and many find their way to the neon boneyard. The lamp above is from the Aladdin before it met some well placed TNT and the one on the right is the Golden Nugget.

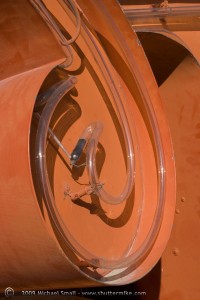
The boneyard was a gold mine of photo opportunities for me. It has everything; color, lines and shapes, great compositions, and a story to be told. The tour does not allow for much exploring on your own, which I would have loved to do. But if you pay attention there are shots around every corner, from the obvious full-size hotel sign to more subtle ones. The “fallen star” above is very Vegas to me and cold be telling a classic Vegas story. What was once a bright star served its purpose, faded and is now laying in a boneyard waiting for another chance. A sign or a Vegas dream?
As with any hobby, amateur photographers could easily go crazy buying all the latest and greatest photography gear. Have you ever seen an avid woodworkers home shop or a scrapbookers hobby room? They are filled with special tools and equipment designed to make the end result better. But does the latest laser guided table saw really result in better crafted furniture? Do the titanium sculpting scissors make a better laid out scrap book page?
The same questions can be asked of photography gear. Is it the photo gear that improves photography?
There are three factors that lead to a good photograph in my view.
- The equipment and gear used
- The technical knowledge of the photographer
- The artistic eye and ability of the photographer
Having all three is an asset for creating better photographs but not necessarily essential. In the end you can have the most expensive telephoto lens on the market today, the fanciest tripod, and a top of the line camera but if you do not know how to operate any of it or if you just do not have an artistic photographer’s eye none of it is going to produce better photography. It is not the gear alone that makes the photographer. In fact a talented photographer can often take a master shot with the simplest of photography gear.
All the latest and hottest gear is fun to have. But before spending a fortune equipping yourself spend some time improving your skills. Study the art of photography – formally or on your own – and practice, practice, practice. That will make you a better photographer who can then improve upon your art with all the great gear available.
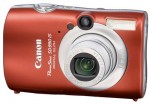 In my last post I talked about 5 things to pay attention to when photographing. I’ll take it one step further and say you can be scouting out potential photography subjects and be paying attention to these five things all the time. You never know when you might come across something you would like to photograph but may not have the time at the moment of discovery. A pocket size point and shoot camera and notebook kept nearby at all times come in handy for just these situations. You can take a quick snapshot (or 5 or 6) of the subject and jot down some notes as to the location and what it is you think you want to focus on when you return with your SLR or DSLR. Then when you return to your computer, down load the images and connect them up with your notes. You can do this either by printing the images and and transferring your notes to the back or even by pasting them into a Word document and typing in the notes. That way you have a file of future photography subjects to explore at a later date and you won’t end up scratching your head trying to remember where you saw that great photo opportunity.
 Artscow.com, a digital photo printing site similar to Snapfish and ShutterFly, has some specials going on that are worth checking out. Here are some coupon codes to use to take advantage of the specials:
7″ x 5″ 20 page hardcover photo book for $2.99 with free shipping – PBKS299
8″ x 8″ 20 page hardcover photo book for $6.99 with free shipping – PBS699
4 11″ x 14″ prints with free shipping – 11X14PRINTS – UPDATE: This one has expired, but Artscow is always running some kind of promotion and still worth checking out.
I went on a photo excursion to the relatively new Tempe Center for the Arts the other day. I had never been before and love the architecture of this building. I did not get a chance to go inside, but if it is half as impressive as the outside I will look forward to getting a chance to see it. I am going to post my general photographs of the building and grounds soon. But in the mean time I played around with focal length in one series of photos just for the sake of comparing what I got by standing in one spot and adjusting the focal settings.
I set the camera on aperture priority and kept the aperture constant at f/13. Since the camera was setting the shutter speed it varied slightly but only between 1/30 and 1/40 second. Then I focused on one spot and shot a series of photographs using 5 of the various focal lengths of m my 18-70mm lens. Here are the results.
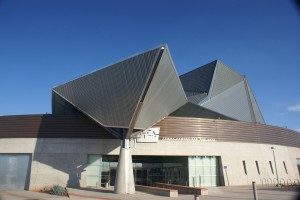
Focal Length = 18 mm
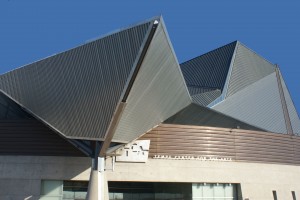
Focal Length = 26 mm
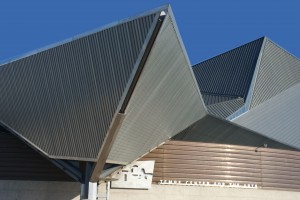
Focal Length = 35 mm
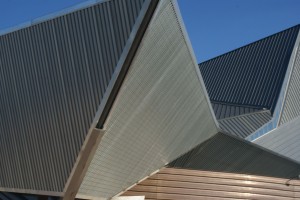
Focal Length = 50 mm
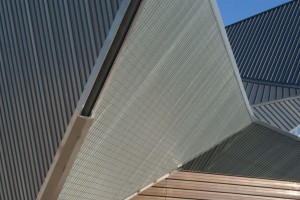
Focal Length = 70 mm
This is a continuation of Part I from yesterday…
6. Digital Photography Review
Need to know how many mega pixels a Canon EOS 450D has? Curious if the Sony A900 or A850 has the features you need in your next DSLR? Then Digital Photography Review, with one of the most comprehensive databases of digital camera specification on the net, is where you need to be pointing your browser. It is a great resource and research tool. And while you are there take advantage of their reviews, buying guides, industry news, and discussion forums.
7. The Digital Photography Connection
Stick to what you know and do it well is the perfect summary for The Digital Photography Connection. I have never counted, but there have to be over 100 photography how-to related videos on this site. Photoshop, Lightroom andgeneral photography are the topics you will find. Each with well produced, quality videos that walk you through everything from Blending Modes and the Channel Mixer to Photographing Fireworks step-by-step. No need for an expensive college education when you have these guys. The videos are free on the site, but a little love via a purchase in their store or donation is always much appreciated I’m sure.
8. Pop Photo
Yep, another print magazine on the Internet. I won’t claim Pop Photo has discovered a whole new way to present a photo site. But if you love all things photography like I do then you are sure to be quite happy with popphoto.com. They are everything you will need in a photo site. Reviews? Yep, got ‘em. Galleries? Of course, what respectable photography site doesn’t? And you just are not with it if there isn’t a forum and blog nearby – no worries, Pop Photo is with it. Oh yeah, contests too! (Note to self – buy lottery ticket). Ok, go ahead and bookmark this one and lets get to number 9.
9. Photography Blog
To refer to this site as a “blog” might not be entirely fair to the rest of us bloggers out there. It started life as a blog in the conventional sense of the word but has evolved into so much more. I aspire to have a blog as beefed up as this site. It is blogging on steroids. Aside from the daily posts on everything you might need to know to keep you up to date on the photography world, photographyblog.com has some great equipment and accessory reviews, a handy buying guide, and the requisite community section with forum, galleries and the like. One of the best things about this site is that it reads and feels like a blog – even with its host of extras – that makes it more down to earth. Bookmark!
10. Kodak Glossary
Last, but of course, not least is the Kodak photography glossary. Odd choice you might think. Even though this site (or section of the Kodak site) appears to have been hastily thrown together by a website design school dropout it is an excellent resource. (But I think they fired that guy because the site probably hasn’t been updated in a while) As I learn photography I have turned to this site to figure out what this or that means. Aspect ratio to zoom lens, Kodak has you covered. One more slight warning, they have a good number of their own trademarked terms in there. But hey, you have to expect a little branding every now and then.
Note: I have no personal affiliation with any of these sites. So everything written here are my thoughts and opinions gathered through using the sites. Of course should any of them like to hire me to write a little something, I probably won’t object.


 For this post, when I talk about color in photography I am not talking about using color film vs black and white film (or changing a digital setting to black and white). Although the choice between shooting in color or black and white can be a critical one, this post is about using color to enhance your composition and even as the subject of your photograph. For many amateur photographers we don’t often think about the mechanics of color when shooting, but all those technical details can really help make or break an image.


