I do not usually think of The Weather Channel as a place I would tune in to see much other than a meteorologist standing in front of a map. But I stumbled upon a show they produce recently about nature photography and I am loving it. From the Edge with Peter Lik follows acclaimed Australian photographer Peter Lik on nature photography shoots across America. The show chronicles Peter’s attempts to get the perfect shot of beautiful and often remote locales. The cool thing is, that just as in real life, sometimes he doesn’t get the shot he set out to get. So he goes after a back shot and often still comes back with great photography. Check out photography from each episode here and set the Tivo to record the Weather Channel on Thursdays and Fridays at 9 Eastern.
Archives for General Photography category
OK, this is pretty cool. Google has taken the traditional search for images and turned it upside down (or in side out?). Up until now you could enter a search term into Google and search for images that match your entered search query. But now, you can actually upload an image and search for sites on the Internet where that image is displayed as well as for images that are similar to your uploaded image. Search by Image has several promising uses. For one, you can upload your own images and see if anyone has “borrowed” them to post on their own sites. Or if you find an image that is close to what you were looking for but not quite, use Search by Image to find more images that are similar. For research purposes this tool can be used as an alternative to the traditional keyword search. Find sites based on the images they display rather than the text on the page alone. Pretty awesome.
Here’s how it works:
You have three ways to search (because three is way better than one).
1) On the Google Image Search page simply drag and drop an image file either from your computer or from a web site and voila, Google returns the matching results. If there are no images that match exactly Google will show “visually similar images” that it deems come close. Visually similar appears to be based on coloring more than anything else.
2) Your second option is to upload an image rather than drag and drop. See that little camera icon in the search box of the screen capture above? Simple click on that and then browse for an image to upload from your computer. The search results work the same as option 1.
3) Last option is to copy and paste an images URL from the web into the Google Image Search box as shown above. Simply right click on an image and select the copy image location and paste that in the search box.
14 Jun 2011
Tips to Keep Your DSLR Clean and Dust Off the Sensor
General Photography, Photo Equipment No CommentsI did a review yesterday of my two latest photography gadgets, a Giottos Rocket Air Blaster and a LensPEN Lens Cleaning System
. But as they say (they being Benjamin Franklin for the curious), an ounce of prevention is worth a pound of cure. So I figured as great as these little cleaning gadgets are, it is better to keep your camera free of dust and dirt in the first place. Here are a few tips to keep your DSLR clean and your sensor dust free.
- Changing lenses – one of the easiest ways to get dust on to your sensor is by being careless when changing lenses. You are exposing the inner workings of your camera to the elements every time you change a lens. Short of never changing a lens, which defeats the purpose of having a DSLR, you can take some steps to minimize the dust that creeps in during the lens changing process. Eliminating it altogether is probably not a realistic option.
- First, be conscious of the environment where you are changing the lens. It is not possible to get to the nearest sterile clean room every time you need to change a lens but you can make sure you aren’t in a dust storm. Shield the camera as best you can from whatever may be blowing about.
- Do a little prep work before switching out lenses. Make sure the lens you are going to put on is lined up and ready to go before you press that release button to take the lens off the camera. Do not remove the lens or the cap off the replacement lens until you are ready to quickly make the switch. The move as fast as you safely can, dust is better than a dropped $1000 lens, and switch out the lenses.
- Always keep your lenses clean, especially at the lens mount end. Clean it after taking it off the camera with a soft brush and air blaster if you have one (which you should after reading yesterday’s post). And even more importantly, clean it BEFORE you mount it on the camera.
- Keep your camera bag clean – The camera bag is designed to help you organize your camera and accessories, carry them easily and keep them clean. But the bag itself can get dirty too. So you need to do a little camera bag maintenance every now and then. The easiest thing to do is to assign one day a month (or really 15 minutes of one day a month) as camera bag cleaning time. Put it on the calendar and then clean out your bag. Empty everything out, vacuum out the bag (gets the fine stuff and animal hair), then make sure everything is dust free as can be before putting it all back.
- Cleaning mode – Become familiar with your camera’s built in cleaning mechanisms. My Sony Alpha 850 has two built in defenses against dust; static-resistant anti-dust coating and CCD-shift dust reduction mechanism. Most DSLRs today have something in place to help keep the dust off the sensor. Read up on what your camera has and understand how it works and what you can do to keep it working.
- Call in the Pros – Like a car or any complicated piece of machinery sometimes you need a professional for both routine maintenance and repairs. A sensor cleaning costs about $30 at my local camera shop and is sometimes just necessary. You can also get routine maintenance cleaning and tune-ups to keep things going at their peak.
For this collage of images I took 64 individual head shots of the 4 Lego mini figure series. I used a Tamron Autofocus 28-200mm f/3.8-5.6 lens with a Kenko 25 mm extension tube in order to get the very close up shots. The back drop was just my black office desk and the lighting was the late afternoon sun filtered through the window shade. Then I used Photoshop to crop each head shot down to 1″ x 1″ and created a new 8″ x 8″ canvas to combine them all together into the collage. Hint, set up a grid of guide lines dividing the page up into 64 1″ squares (or whatever size you are working with) and then set the snap to for the guidelines. This will insure each image is properly aligned.
Any one that regularly pursues a creative outlet, through writing, painting, photography or anything really, have probably hit that proverbial wall where they are stumped for the next inspiration and idea. In my photography I have been a victim of photographer’s block many times. It can either manifest itself in a lack of desire to go out and photograph or a lack of inspiration when I do go out. Nothing strikes me as photographable.
So what do you do when you hit that creative wall? One solution I ran across recently is a 60 minute photo challenge based on a pre-determined theme. Essentially you assign yourself a theme and give yourself 60 minutes to photograph anything that falls into that theme. Your theme can be anything you can dream up from something very simple like red to a little more complex and abstract like memory. Once you have a theme in mind head out to a good location and shoot whatever strikes you as being related to your theme for 60 minutes. You are free to stray if your theme inspires you beyond its original parameters, but it can also be a challenge to really limit yourself to just that one theme. It can help you see things in a new light that your creativity block may have been preventing you from seeing.
 Round
f/9.0- 1/200 sec – ISO 100 – Focal Length 90 mm
Round
f/9.0- 1/200 sec – ISO 100 – Focal Length 90 mmThis exercise can also work just as a personal challenge even if you are not at a loss for photography ideas. It will allow you to step outside of what you normally do and push your creativity. I have started a list of themes to have ready for the next time I have 60 minutes to spare or next time I am feeling up against a creativity block.
Here are a few ideas to get started:
- Colors: red, blue, green, orange…you get the idea
- Shapes: round, square, triangles, etc.
- reflections
- shadows
- repeating patterns
- texture
I did my first 60 minute challenge this weekend with the theme of round. So I decided to continue that theme all week and each Photo of the Day this week will be from my round photo shoot this weekend.
You can also check out a video from Adorama TV that discusses the concept of a 60 minute photo challenge more.
There is a lot to look at on National Geographic’s photography page and it is easy to lose track of time while scanning the countless galleries. One easy way to stay caught up and not lose (is it lost?) half your day in the site is to add the Photo of the Day section to your Google Reader or similar feed. Of course if you are new to the site there are 10 plus years worth of photos of the day to catchup with. No time for over 3,600 photos? Try the condensed version with the best of the best in the Ten Years of Photo of the Day gallery.
19 May 2011
My Residential Architecture Photography Bucket List
Architectural Photography, General Photography No CommentsI may not have enough time to complete this residential architecture photography bucket list by this Saturday’s rapture but I think I will take my chances and make my list anyway. My bigger goal, beyond photographing the three residences on this list, is to continually hone my architectural photography skills to the point that I can turn a passion into a living. But the three works of architecture on this list represent the best of the best to me. The holy grail of design in architecture, if you will, that I would love to add to my photography portfolio. Luckily this is not a difficult goal to accomplish. It will just require some travel and time (not time travel, although that might make it more interesting).
Number Three: Philip Johnson’s Glass House
It is called The Glass House for a reason. You might feel a bit exposed and on display living in what is essentially a glass box. But the house is situated on its site in such a way that it is not subject to public view. Philip Johnson designed the New Canaan, CT house in 1949 as his personal residence and lived there until his death in 2005. The Glass House is minimalist modern architecture in its purest form and its literal transparency allows the site and building to co-exist, rather than one dominate over the other. The house was heavily influenced by my number two house, Mies van der Rohe’s Farnsworth House, which at the time Johnson built his house, was still an unbuilt concept. The similarity between the two is obvious although Johnson’s choice for no interior walls at all as well as each house’s site, which are integral parts of their overall design, make these two very unique and photo-worthy properties.
The National Trust for Historic Preservation maintains the house and offers tours. There are several Johnson designed structure on the property in addition to The Glass House which I am sure would make for some fantastic architectural photography.
Number Two: Ludwig Mies van der Rohe’s Farnsworth House
I love modern. Modern architecture, modern design, modern. Built in 1951 near Plano, IL, the Farnsworth House embodies the concept of modern residential architecture. van der Rohe brought the movement that began with Europe’s Bauhaus to the Central United Sates through the Farnsworth House. Glass and steel allow the house to be reduced to its simplest forms leaving a clean and transparent structure on a wooded, river-side site. Although it may not be practical for most to live in, it it is a near perfect example of architecture as art. It sits in the woods more like a sculpture than a residence.
The Farnsworth House is owned and operated by the National Trust for Historic Preservation which offers several different tour options (including a self guided tour, which I think is a great concept for photography without trying to keep up with a tour guide and group). Photography does have some restrictions, like no tripods and the requirement of a special permit to photograph inside. The photography permit gives you 20 minutes inside the house with your camera and will add on $30 to the price of the $20 ticket, but I wouldn’t think twice about paying it. This is my Residential Architecture Photography Bucket List after all.,
Number One: Frank Lloyd Wright’s Falling Water
I have been in love with this house long before I developed a passion for photography. (My passion for architecture goes back further.) So the iconic Wright designed Falling Water in Pennsylvania is at the top of my list. Built between 1936 and 1939 for the Kaufmann family the house is synonymous with Wright and his organic style of architecture. Falling Water is integrated so well with its site along Bear Run Creek that it actually cantilevers over the falls making it one with the site. For an architectural photographer I think this house pretty much has it all. It is one-of-a-kind and sits in an environment that by itself is a fantastic photo opportunity. The clean lines, natural materials and oneness with its environment, not to mention its mere legend in American architecture make Falling Water number one on my Residential Architecture Photography Bucket List.
The 2,885 square foot house cost $155,000 in 1938 and today is under the care of the Western Pennsylvania Conservancy. It is open to the public for tours, one of which allows photography and one that does not.
18 Apr 2011
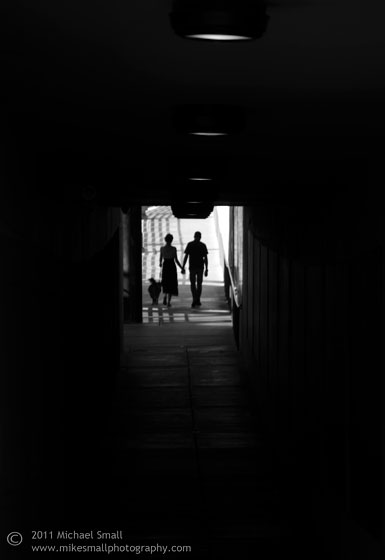
Photo of the Day – Light at the End of the Tunnel
General Photography, Photo of the Day No Comments
I have decided if I can take my hobby to the next level and try to make some money from it. At this point I am not anywhere near the “I can quit my day job” level. But who knows, it may happen some day. In the mean time I am doing small things to promote my photography business like listing it on Google Places, getting business cards and the all important Facebook page. I used Wix to build the Facebook page, the same template based site builder that I used for my main site www.mikesmallphotography.com. Please check out my new page and click that little LIKE button to keep up with how things are panning out.
Already 70-some days into 2011; time flies. That means I should be 70-something images into this years 365 Photo Project on Flickr. I am a bit behind, but only by a few days. But check out what I have so far. Sometimes they are the same images as the Photo of the Day on Shutter Mike, but depending on how much shooting I can fit into any given day there are differences.


