Archives for Photo Techniques category
This is a follow up to my post the other day about 6 Free Photo Editing Programs. The difference is that those were downloadable programs and these are free online photo editors. So if you are concerned about hard drive space or have commitment issues with downloading a software program these could be a good alternative for you. In no particular order, five worth giving a spin are:
 Sumo Paint is relatively new to the online photo editing game having been released about a year ago. It also differentiates itself from some of the other options by being less of a photo editor and more of an art creation tool. It has most of the tools you would expect that allow you to turn your photos into a unique work of art. Yet, what sets it apart from traditional photo editors are some of the extras it has that give you the ability to create art from scratch.
Some of the features and tools you will find in Sumo Paint Include:
- A whole lot of filters – liquid waves, spherical mapping, camouflage, glowing edges, twirl, and noise to name a few
- Layers
- Clone, lasso, blur, color picker and magic wand tools
- Text editor
- A large selection of brushes
A few of the cons you might encounter include requiring Flash be installed (but who doesn’t nowadays?), a bit more time consuming with larger files sizes, no direct integration with social media and photo sharing sites such as Flickr and of course you are working online so it is dependent on the availability and speed of your internet connection.
 Flauntr is broken down into several different tools with names like editR, textR and styleR. It has a lot of fancy gadgets designed to “pimp” out your photos such as adding frames, shapes and text. It also is big on integration with social networks and your mobile phone. The main drawback of Flauntr is its unusual interface. The saying “if it isn’t broke, don’t fix it” seems to apply well to this photo editor. By that I mean most other photo editing programs follow a somewhat standard interface design. It works and most don’t deviate too far from what is the “standard.” Flauntr seems to take being different to the extreme. So much so that it is a bit confusing to navigate. However, it does have some cool features you will not find elsewhere.
- profilR – allows you to customize your photos to match the profile picture specifications of a long list of social networks
- picasR – offers a library of historic paintings to reference for colors – I never quite figured out how this works, but it seems like it should be a neat concept
- stylR- gives you frame overlays and magazine covers to get creative with your photos
 FotoFlexer has many of the features and tools of both the free offline photo editing programs as well as some of the programs you can purchase. It also includes many of the fun extra features from programs like Flauntr and integrates with the major social networks so you can edit and upload your photos. Overall FotoFlexer is one of my favorite free online photo editors. The interface is intuitive, the features are rich and it produces good results – all for free. Even the ads which help pay for the site are rather non-intrusive. Here are a few things you can expect from FotoFelxer:
- Basic editing features such as red eye correction, cropping, rotating, resizing, and contrast and brightness correction.
- Special effects for photos such as blur edges, greyscale, sepia, ink stamp and soften
- “Decorating” options such as a text editor, eraser, drawing, and things like adding “stickers,” borders and the like.
- Portrait tweaking tools such as blemish and wrinkle removal
- Layers!
- A very easy and useful undo button
 Lunapic is differentiated from the first three by the fact that it is is html based, meaning if you don’t have flash installed you can still use the program. It’s layout is also a bit different in that it looks less like a photo editor and more like any other web page. i.e. the ads are very prominent and there are a header and standard footer – it looks like most any other web page. The first three above are much less “website” like and more photo editor in appearance. Appearance aside, here are some of the features you will find in the Lunapic photo editor:
- A good number of animation features such as slide shows, transitions, fire and lightning effects and a new “glitterizing” effect
- All the basic editing tools including crop, magic wand, rotate, resize, and scale.
- Drawing and text tools including color picker.
- Adjustment tools such as blur, tone, red eye reduction and contrast.
- A respectible list of effects or filters including one called “lego” that makes your picture look as though it is made out of Lego bricks.
 At first glance you are going to notice that the Phixr web interface is a bit rudamentary and dare I say “boring.” It is certainly lacking the pizzazz that many of the other free online photo editors have. It is also lacking some of the features and is not exactly straight forward in how the features it does have are presented. Phixr focuses on integrating with the major social networking sites, Facebook, Flickr, Photobucket and the like, and is scaled back on the enhanced editing options in order to make basic and quick edits to your photos. If you are looking for a robust program to do some of the more advanced edits allowed by a program like FotoFlexer or Lunapic, Phixr is probably not for you. If all you need is a quick and dirty fix or change to get the picture back up to Facebook this one has what you will need to get the job done. Here is what you can expect to find in Phixr:
- The basic editing options of rotate, flip and the like
- A short, but effective list of effects such as swirl, pop art, black and white and sepia
- Ability to alter brightness, hue and saturation
- Red eye correction
- Text
Another great resource for specs on these and many more online photo editors is this article by cnet.com.
I am a big fan of PhotoShop, but it can be pricey and a bit cumbersome to learn if you do not have a lot of time to dedicate to it. For amateur photographers, without all the time and money, there is good news. There are a lot of photo editing software alternatives out that that are priced just right to fit anyone’s budget. They are free!
I am listing six of the more popular ones here although there are plenty more out there. Keep in mind that none of these are going to be quite as robust and feature rich as PhotoShop, but in most cases they will get the job done perfectly well. These free photo editors are in no particular order.
 Photoscape is touted as being fun and easy to use. It is great for the point-and-shoot photographer as well as the amateur looking for some more professional features in a photo editor without the cost of commercially available programs. In addition the ease of use is supported by a good array of how-to videos on the Photoscape site.
Some of the features of note are:
- View, edit, batch edit and combine photos
- Built in templates to create collages, comics and other creative works
- Supports RAW image file formats
- Re-size, crop, and filter images
- Red eye removal feature
- Brightness, color and white-balance adjustments as well as noise reduction
 GIMP, which stands for GNU Image Manipulation Program, has been called “One of the most powerful general-purpose image editors around…” by cnet.com. GIMP is often recognized for its comparability to PhotoShop in features as well as being compatible with all the major operating systems, Windows, Mac and Unix.
A few of the features GIMP offers are:
- All the paint tools you would expect – brush, pencil, airbrush, clone
- Layers and channels
- Transformation tools such as rotate, flip, and scale
- Filters and effect
- Editable text layers
- Some very rich animation tools
- A whole lot more…
 For all the basics you may need without some of the complexities and overkill of more advanced photo editing software programs Paint.net is ideal. For what it lacks in “professional” elements (no RAW file support for example) it more than makes up for with an array of photo editing attributes to keep even the advanced hobby photographer happy. To top it off Paint.net is an easy to learn, intuitive program.
Here are a few of the things you can expect to find in Paint.net:
- Layer support
- Action manager
- Editing tools such as crop, resize and rotate
- Color enhancement and correction tools
- Red eye correction – although this has been reported to not be its best feature
- Magic Wand, Clone Stamp and text Editor tools
 Pixia’s website definitely lacks the flash and “professional” appearance of many other photo editing software sites, even the free ones. But don’t let that fool you. What started as a Japanese language program has produced a very popular English language version. It is limited to the Windows operating system however and is not ideal for the less tech savvy user due to its steep learning curve. Yet it does a good job of packing some useful tools into a free photo editing application and is worth the extra trouble if you can spend the time to conquer its complexity.
Pixia has the basics you would expect and then some:
- Supports masks and layers
- A wide array of filters including black & white and sepia effects
- Drawing and paint tools
- The photo editing basics including crop, rotate and color adjustment
 PaintStar is a versatile and feature rich photo editing software program. The interface is relatively intuitive allowing those unfamiliar with image editing programs to master PaintStar without too much trouble. Like many of the free programs discussed here if you need RAW file support or are working on a Mac PaintStar is not going to be the program for you. Otherwise it is well worth giving it a try.
Here is a brief list of what you will find in PaintStar:
- Numerous painting tools including all the basics as well as customizable brushes
- Image morphing
- Support for more than 30 files types – JPEG, GIF, TIFF and then some
- Over 100 filters and effects
- All the transformation tools you’ll need including rotate and scale
 Photofiltre has ease of use and intuitiveness on its side. It has menus and icons you will easily recognize making the learning curve on this one less steep than some of it s competitors. Some have gone so far as to say its features rival some commercial photo editing software packages on the market. In addition it has optional plug-ins that can be downloaded and added; something most free image editors do not offer.
Photofiltre offer these and many more features:
- A wide range of filters
- Magic wand and clone stamp
- Image effects, photo masks and image adjustments
- The paint brush and drawing tools you would expect
- Batch processing capabilities
The bottom line is that there are a lot of options out there for photo editing and you do not need to spend a fortune to take advantage of their features. Many people have put a lot of time and effort into some excellent free alternatives to the commercial programs. Although none may be as rich as PhotoShop most will do just about everything the amateur photographer needs.

I have been trying to go beyond just taking a photograph and do some creative things with them. At the same time I am practicing my Photoshop skills and trying to expand them beyond the basics.
For this collage of images I went through all of my photos using the Adobe Bridge program and sorted images that were mainly blue into a new folder. This was harder than I thought since I decided to avoid pictures that were blue because of the sky. There were a lot of those, but I wanted the blue to come from the focus of the photo rather than the background.
Next I re-sized and cropped the photos so that they were each 2″ x 3″. I started making them 3″ x 3″ squares but this distorted too many of them so the rectangles worked much better.
Finally I arranged the photographs on a new canvas. It is not exactly expert level Photoshop work, but I was very happy with the result.
Now to find green photos…
I was in San Diego last week and wanted to try some more night time photography. Since one of my favorite subjects in architecture I thought the historic architecture at Balboa Park would be a good place to try out some long exposures and see what I could get. Many of the buildings, especially those along the El Prado walk, are well lit at night. Their Spanish style architecture makes for a great subject against the dark night sky.
Before I get to the photos, here are a few things I learned that are key to producing good night photography:
- It is very difficult to do without a good tripod. The one I had at the time was broken and would not extend all the way up. Crouching down to try to see through the view finder is both uncomfortable and makes getting a good shot harder. (But my new Induro AB2 has since arrived. I am anxious to try it out and will let you know how it goes.)
- In addition to the tripod, a shutter remote is an invaluable tool to help avoid camera shake. They can be found online for very little money.
- Take a flashlight, or some source of light. I did not and it would have been very helpful for seeing the tripod’s level and camera settings.
- Experiment with different shutter speeds and apertures. Take the camera off automatic. I am working with digital photography so the cost of film and developing are not an issue. Take as many as you need to get the few good ones.
- Watch a tutorial video such as this before you go out shooting. I didn’t, but it would have been helpful.
Casa del Prado Theater
Exposure Program: Manual
f stop: f/5.6
ISO: 100
Focal Length: 50 mm

Casa del Prado
Exposure Program: Manual
f stop: f/5
ISO: 100
Focal Length: 20 mm

Botanical Building
Exposure Program: Manual
f stop: f/5.6
ISO: 100
Focal Length: 55 mm

After photographing the fireworks last week I decided to try some more night time photography. South Mountain in Phoenix is known for its sunset and city lights views. A short drive up to the 2600 foot summit gets you to a great lookout over the city perfect for photographing the sky and city below.

This was definitely a trial and error process for me as I am taking the camera off the auto mode and manually adjusting the settings. For this shoot I played with shutter speed to see what I got and hopefully learn something in the process. Ideally I should not be focusing on one setting in the “Exposure Triangle” and leaving the others to default, but I am trying one step at a time.
I got some fair pictures but better yet learned a few things in the process…
- As with shooting fireworks timing is everything. Lesson learned: get to the destination early enough (in this case before the sun starts setting) to stake out a good spot and get everything set up. For photographing city lights twilight is ideal rather than when the sky is completely dark.
- Tripod, tripod, tripod. My camera has image stabilization built into the body. But at slow shutter speed a tripod is critical. A remote would have helped too.
- Underexposure and overexposure are very easy to do. If I had adjusted the aperture and ISO as well as the shutter speed I’m sure I could have improved exposure greatly. Otherwise I need to experiment more to find a happy medium. Or there are some Photoshop tricks to adjust this after the fact. But I prefer to get it right without having to do too much editing.
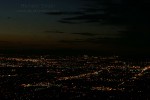
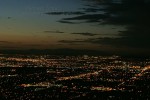
Original Image Corrected in PhotoShop
Click the images to see larger versions.
 This post is by no means a “how to” on photographing fireworks. For that, do what I did and read “How to Photograph Fireworks Displays” from the Digital Photography School. They are a great resource with a lot of good advice and tips.
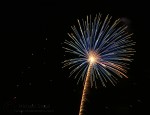
 I attempted photographing fireworks for the first time last night, the Fourth of July. I was happy with a few of my shots, but that is a few out of 135. Here are some of the tricks I picked up from DPS’s post and trial and error while out shooting last night.
Location, location, location. Scout out a good location to set up early. If you are too far away you are not going to get good photographs unless you have a really good telephoto lens . Also keep in mind you are going to need someplace to set up your tripod.

Timing is everything. I do not have this mastered yet, but it takes some practice to know just when to hit the shutter button. Too early and all you get is the trail of the rocket going up (like this one). Too late and you get a nice shot of smoke. I found that after watching a few rockets you can anticipate what the half way point is between being launched and exploding. That seemed to be the best time to hit the button.
Experiment. Photography is all about trying different things to get the shot you want. This was especially the case with photographing fireworks. Here are some of the things I tried (some worked and others didn’t):
- Shutter speed – I started out at 5 seconds and tried various speeds down to 2 seconds. I think somewhere between 2.5 and 5 worked best for me.
 Aiming the lens – It is very hard to know exactly where to aim into the dark to get the shot you want. I found aiming in the direction of the fireworks display and then tilting the camera on the tripod slightly up and down to keep the show in frame worked fairly well. Sometimes I missed.
- Focus – How do you focus on something that is there for only seconds and you can’t touch the camera? Not easy to do, but I used the manual focus (keep auto focus off for this) and focused on something in the direction of the show and then left it alone.
- Aperture – I read that an aperture range of f/8 to f/16 works best for fireworks photography. So I trusted the experts and did not experiment with this setting leaving it at f/8.
Equipment. There are a few essentials that will make photographing fireworks much easier. First, a tripod. It is critical to fireworks photography to keep the camera steady. No matter how unnerved you are or how steady handed, no one can keep the camera absolutely still at the longer shutter speeds. Second is a shutter release cable or remote. This is a great tool when taking pictures with long shutter times. It allows you to keep your hands off the camera completely eliminating any movement. A self timer could also work, but you need to be very good at your timing since you need to set it to go off right before the explosion which is hard to anticipate.
Keep Shooting. The great thing about digital photography is that it costs the same to shoot 10 photographs as it does 100. So in the case of something like a fast action fireworks display just keep shooting. You can sort through the photos later to eliminate the ones that did not work and Photoshop as necessary.


These photos are the result of playing around with some Photoshop filters on the same fire hydrant photograph taken at Chandler Gilbert Community College.
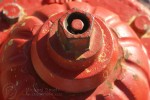
Original Version

Glowing Edges

Cut Out
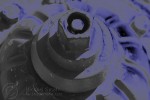
Neon Glow - Blue
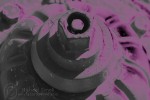
Neon Glow - Pink
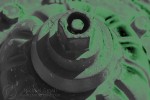
Neon Glow - Green
Click on the images for a larger version.
Since photos float around the Internet rather easily nowadays and many people consider it “free for the taking” if it is posted online, I thought this tutorial I ran across might be useful to share. It requires some basic Photoshop skills but the how-to is well written and pretty easy to follow.
Batch Watermarking & Adding Copyright with Photoshop
I have taken one Photoshop class and do not use it too much on my photography other than to fix a few distortions or remove red eye. But there is so much you can do with it and I like playing around in it. Learning more about Photoshop and practicing on my photos is definately on my to-do list.
I stumbled upon this great site with Photoshop tutorials. The one I am starting out with is 50 Great Photoshop Tutorials for Clever Beginners. It gives step-by-step tutorials on 50 different things you can do with Photoshop. I will post the results as soon as I get some results that I am happy with.
 Sumo Paint is relatively new to the online photo editing game having been released about a year ago. It also differentiates itself from some of the other options by being less of a photo editor and more of an art creation tool. It has most of the tools you would expect that allow you to turn your photos into a unique work of art. Yet, what sets it apart from traditional photo editors are some of the extras it has that give you the ability to create art from scratch.
 Flauntr is broken down into several different tools with names like editR, textR and styleR. It has a lot of fancy gadgets designed to “pimp” out your photos such as adding frames, shapes and text. It also is big on integration with social networks and your mobile phone. The main drawback of Flauntr is its unusual interface. The saying “if it isn’t broke, don’t fix it” seems to apply well to this photo editor. By that I mean most other photo editing programs follow a somewhat standard interface design. It works and most don’t deviate too far from what is the “standard.” Flauntr seems to take being different to the extreme. So much so that it is a bit confusing to navigate. However, it does have some cool features you will not find elsewhere.
 FotoFlexer has many of the features and tools of both the free offline photo editing programs as well as some of the programs you can purchase. It also includes many of the fun extra features from programs like Flauntr and integrates with the major social networks so you can edit and upload your photos. Overall FotoFlexer is one of my favorite free online photo editors. The interface is intuitive, the features are rich and it produces good results – all for free. Even the ads which help pay for the site are rather non-intrusive. Here are a few things you can expect from FotoFelxer:
 Lunapic is differentiated from the first three by the fact that it is is html based, meaning if you don’t have flash installed you can still use the program. It’s layout is also a bit different in that it looks less like a photo editor and more like any other web page. i.e. the ads are very prominent and there are a header and standard footer – it looks like most any other web page. The first three above are much less “website” like and more photo editor in appearance. Appearance aside, here are some of the features you will find in the Lunapic photo editor:
 At first glance you are going to notice that the Phixr web interface is a bit rudamentary and dare I say “boring.” It is certainly lacking the pizzazz that many of the other free online photo editors have. It is also lacking some of the features and is not exactly straight forward in how the features it does have are presented. Phixr focuses on integrating with the major social networking sites, Facebook, Flickr, Photobucket and the like, and is scaled back on the enhanced editing options in order to make basic and quick edits to your photos. If you are looking for a robust program to do some of the more advanced edits allowed by a program like FotoFlexer or Lunapic, Phixr is probably not for you. If all you need is a quick and dirty fix or change to get the picture back up to Facebook this one has what you will need to get the job done. Here is what you can expect to find in Phixr:


