Archives for Photo Techniques category
Beyond Megapixels had a very timely post for me recently on Curing Photographer’s Block. There are times when I head out with camera in hand and nothing inspires me. I may try to shoot something hoping for the best but come back with an empty memory card or images that are uninspiring. Tiffany at Beyond Megapixels offers 5 great tips for getting beyond the block and back to shooting. If you don’t have her blog on your reader be sure to add it. It is well written and offers some great tips and information on photography.
As a refresher from my previous posts on composition in photography, composition refers to how the elements in the frame are constructed and arranged to result in the desired final image. You will often hear people speak of the “rules” of composition and a set way of composing an image in order for it to be considered visually appealing. My stance on the rules is that as long as you are aware of them and able to follow them you are not required to follow them. Photography is an art that is open to the interpretation of both the photographer and the viewer.
The “rules” around when to compose a photograph with a vertical layout versus a horizontal layout center around the composition of the subject itself. It is often rather obvious which way to turn your camera based on the general layout of the subject. The subject dictates the orientation in many cases. However, the final decision is up to you as the photographer and your interpretation of the scene and how you want to present the final image may contradict what the subject commands. This is where you have the luxury of trying it both ways and often achieving a completely different look just with a turn of the camera.
The two images below are of Cathedral Rock in Sedona Arizona. The top photograph, taken with a horizontal orientation, tends to push the main subject back further as it brings in more of the vegetation to the sides and the stream in the foreground. This is a great way for setting the scene and telling the whole story of the subject and its surroundings.

This image was taken with a vertical orientation. The resulting photograph has the main subject filling more of the frame from left to right and therefore appearing more as a central focal point. The foreground is still dominated by the stream and allows for the “story” of the subjects surroundings to be told.

As a rule of thumb, tall subjects that are vertical in nature dictate a vertical camera orientation while wide subjects that spread from left to right dictate a horizontal camera orientation. Use that as a guide when deciding what will work best for your subjects. But use your gut and artistic instinct as the final decision maker.
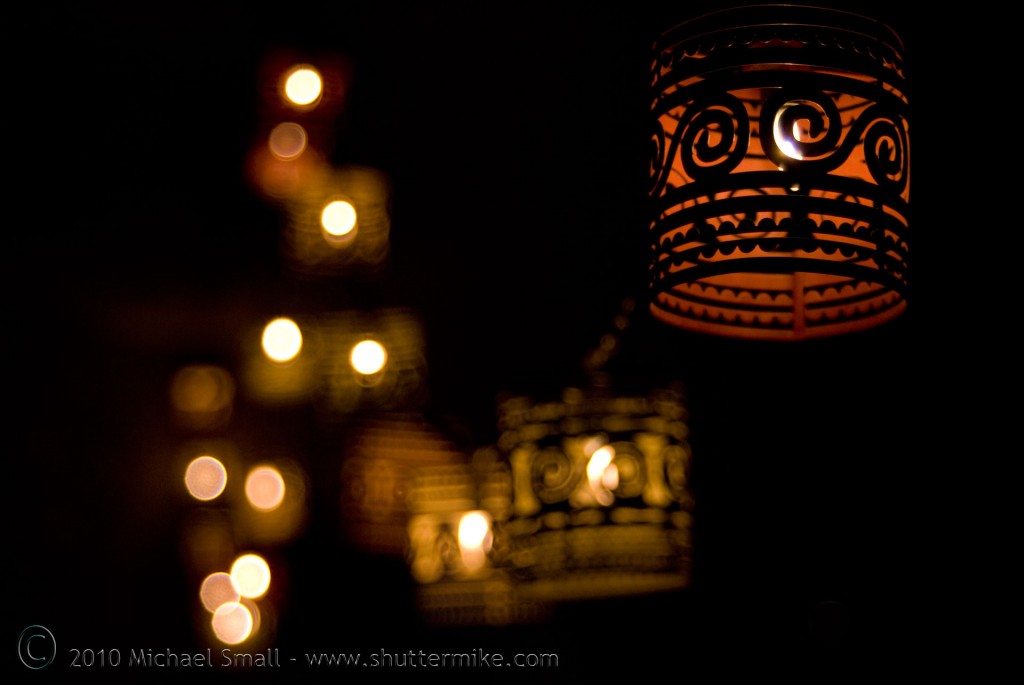
The term bokeh refers to blur in an image. But more specifically, it refers to blur used for aesthetic or artistic purposes not just “oops I did not focus properly blur.” Good bokeh is generally used for parts of the image that are outside of the depth of field to render them blurred and distinguish them from the main focus of the photograph. However, as with all of the rules of photography, sometimes you need to reinterpret them or outright break them. If it makes sense to you to blur the entire image then go for it. Since bokeh is an artistic effect it is open to the interpretation of the photographer and should be used to create an more beautiful image.

You can achieve a bokeh effect in your photographs using the same principles you do to accomplish a shallow depth of field. To manipulate the depth of field you can adjust several factors such as lens focal length, aperture, and shooting distance. Using a large aperture (smaller f number) will give you a shallow depth of field in your images thereby blurring out the background of the scene. You can also accomplish a full image bokeh effect by setting your camera to manual focus and intentionally not bringing your subject into clear focus. Generally an over blurred image is considered a mistake and not bokeh. But if you can pull it off and it works with the image you are presenting there is no reason not to experiment and see what you can come up with .

 I have done a few posts on the rules of photography such as how various composition methods from leading lines to framing an image are designed to make a more visually pleasing image. One key point I believe is important with all the rules of photography is that you have to know how and when to break them.
I am participating in a 365 Photo Project hosted by Faded and Blurred. One of my recent images was taken under tungsten lighting and I did not adjust the white balance settings in the camera to compensate for the yellowish/orange glow that is omitted by normal household bulbs. Nor did I do any post processing work to make it “right.” This elicited some comments that the white balance was “not right.” From a purely technical standpoint I totally agree with the commenter. This image is not “correct” according to the rules of white balance. However, as photographers, amateur or professional, we have the benefit of “artistic license.”
Artistic License – the freedom to create an artwork, musical work, or piece of writing based on the artist’s interpretation and mainly for effect.
I intentionally left the orange glow given off by the tungsten lighting of the room because I felt it resulted in the image that I was looking to create. It sets a mood and more accurately reflects the true setting of the scene.
The constructive criticism that you get from fellow photographers when sharing your photographs on sites such as Flickr is a huge benefit. So I do not object to one of my images being interpreted as being “not right.” But I stand behind my belief that as long as I know and can follow the rules of photography I am free to break those rules to interpret a scene or subject and create an image with my creativity added. But you do have to have a base understanding of what you are doing before you are free to deviate.
 The composition rules in photography all serve the general purpose of engaging the image’s viewer with the image. That may be through getting an image that follows certain standards of beauty or enticing some sort of interaction from the viewer. The purpose of leading lines in a photograph is to lead the viewer’s eye through (and occasionally right out of) the photograph so that they view the image as the photographer wants them to see it, starting at point A and following a specific path to see the image as the photographer saw the scene. Leading lines are also used to bring the viewer’s attention to one particular point in the image, generally the main subject.
How the leading line is achieved and what is used to construct it is completely up to your imagination. Railroad tracks are probably the most common example of a leading line. But fences, roads, the edge of a building, or a row of similar objects can all make a leading line. As mentioned in the Framing the Subject post the “rules” o f composition are not absolute so much as they are guidelines to use and expand upon to produce images that are appealing. As photographers we have to interpret and often break or reconstruct these rules to get the images we are after.


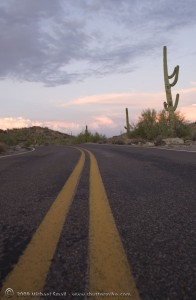
The image in the upper right is using the yellow lines of the road as the leading line to start the viewer in the lower left corner of the photograph and leading them to the center and the sunset.
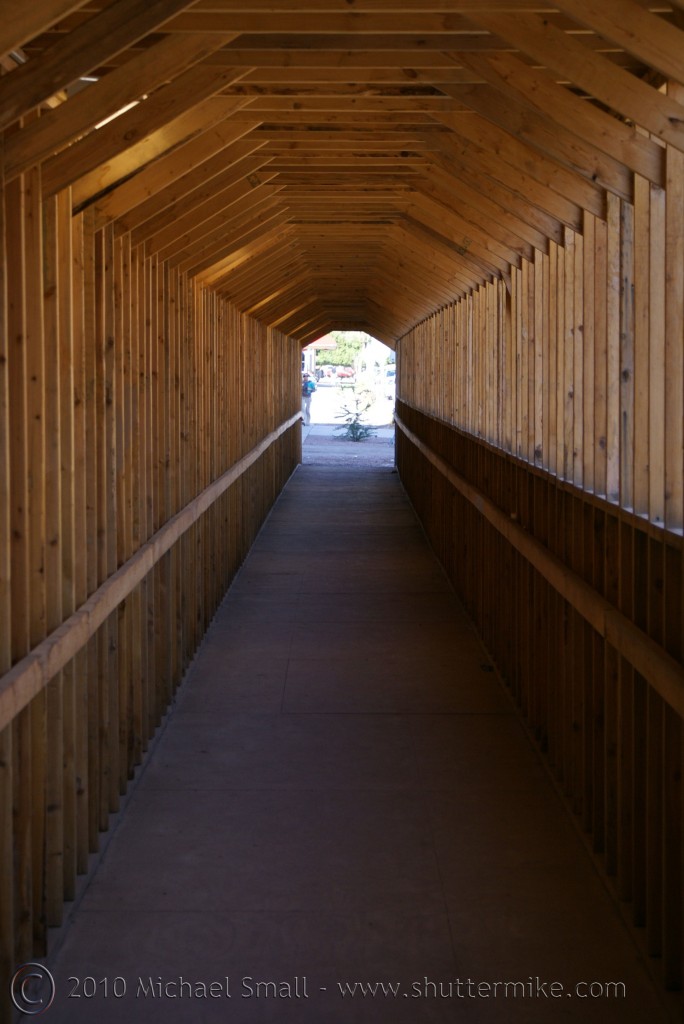
The photograph of the tunnel above is simply directing the viewer’s eye to a termination point of the light at the end of the tunnel.
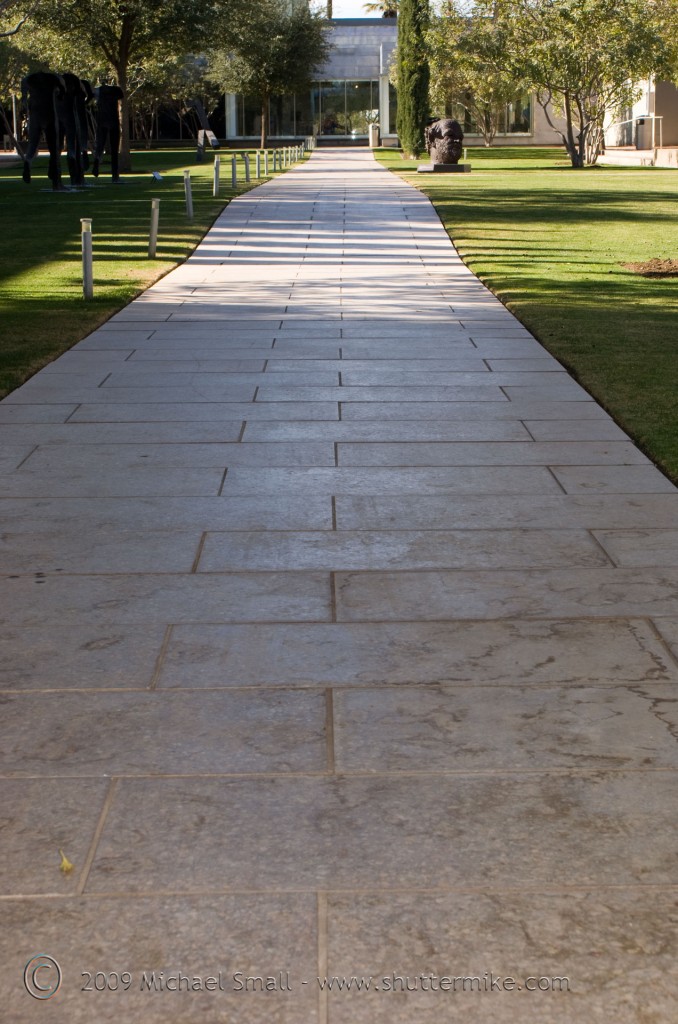
Finally, the image of the path on the right takes the photograph viewer from the shade to the light and finally the museum building at the end of the path. In this photo one could argue that the path, or the leading line, itself is the subject rather than termination point of the museum.
 In photography, composition refers to how the elements in the frame are constructed and arranged to result in the desired final image. There are many “rules” of composition in photography that are designed to produce an image that is appealing to the human eye. Of course there is no one thing that is universally beautiful. So these rules are not absolute so much as they are guidelines to use and expand upon to produce images that are appealing. As a photographer you have to interpret and often break these rules to get the images you are after. They do not have to be, nor are they meant to be, set in stone and followed blindly.
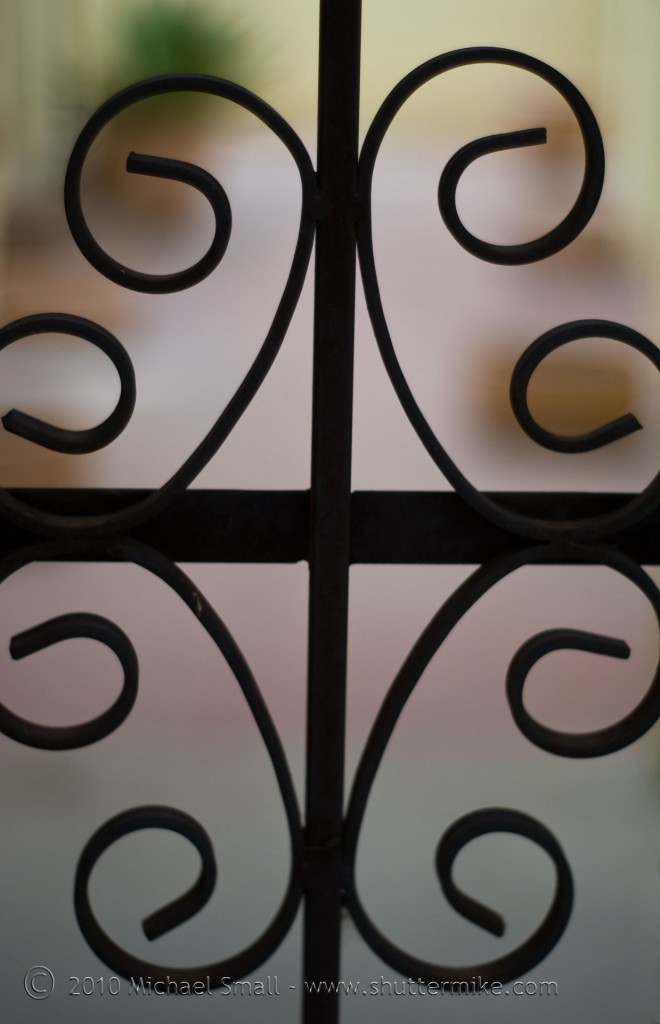
A good (and relatively easy) rule of photography composition to start with is framing the subject. Simply put, framing a subject in an image is a photographic technique similar to physically framing your image in a picture frame. Only in the case of photography you are using elements in the image to frame the part of the image that you want to draw the viewers attention to.
When you are composing your shot look for natural elements in the scene that could act as a frame for the main subject you want to draw the viewer to. It does not need to be a solid, four-sided physical frame however. It can be an implied frame, a hint of a frame on only 2 or 3 sides or anything you feel is appropriate for the image you want to make. Remember the rules are made to be broken.


 Railroad Bridge in Sepia
f/5.6 – 1/500 sec – ISO 100 – Focal Length 50 mm
 Photoshop CS4 is an amazing tool for photographers. It offers some very complex and powerful tools for fixing, improving and artistically altering your images. But it also offers some very basic tools that do not require too much advanced knowledge of Photoshop and most anyone can quickly learn to use. One of those is adding a sepia tone to an image. Sepia simply means a brown color tone with a hint of red.
Most actions in CS4 have more than one way to be accomplished. But one of the easiest ways to get this effect is to use the adjustments tool. Here are the 3 easy steps to take a color image like the one on the right and give it a sepia tone like the one above.
- From the menu bar at the top go to image>adjustments then select black & white.
- Your image has now turned black & white and the Black and white dialogue box has opened. In this box, just below the color sliders is a check box next to the word tint. Check this box.
- The default should be a sepia tone. So you can stop here if you like the coloring. But if it defaults to another tone or you want to further adjust the sepia color click in the square of color to the right of the word tint and change your color to anything you like.
The fundamentals such as proper exposure and composition are a critical part of photography. By understanding these photography fundamentals you can improve your images immensely. But there are also some very basic things you can do without much studying or mastering new concepts.
1) Know your camera, really know it! – Whether you have a point and shoot or an advanced DSLR your camera is a sometimes complex machine full of features, buttons and dials. The best thing you can do to really know your camera is to read the manual from cover-to-cover. The manual will give you all the basic information you need so that you can become familiar with all those functions and dials and buttons.
If you don’t have a manual for your camera you are not out of luck. There are a couple of options for missing camera manuals.
- Most camera manufactures have online versions of their manuals available for download. Here are some of the more common ones:
- For an even more comprehensive “manual” than the one that came with your camera try the Magic Lantern series of books
 . These are well written and detailed guides to your camera that guide you to everything you need to know about your camera.
2) Take your time – Rushing through a photo shoot is going to result in images that look like you rushed. Take the time to explore your subject; to shoot from different angles; to really think about what you are shooting and the end image you would like to capture.
3) Pay attention – Pay attention to your surroundings and those of your subject. Yes, the subject itself is important, but so is everything around it. A distraction in the background can ruin the perfect shot. If you have ever seen a tree growing out of the top of someone’s head in an image you know what I mean about the background. But it is not just the background that is important. All the elements of the setting can influence the final image. Here are just a few things to be on the look out for:
- Shadows – yours, your subjects and any others that might be creeping into your image
- Distractions – in the background or in the foreground – anything that takes the focus off your main subject
- Lighting – Glare, bright spots, dark spots, uneven lighting
4) See what everyone else is doing – One of the best ways to improve what you are doing with your photography is to see what your fellow amateur photographers are doing. The Internet is full of resources for this. Look, ask questions, make comments, post your own photos, ask for feedback. Participate in the online photography community. Here are a few places to start you off:
5) Shoot, shoot and shoot again – Cliche as it is, practice makes perfect. Even if you don’t know the difference between shutter speed and aperture you can improve the images you capture by shooting and shooting often. But don’t just shoot. Take a critical look at your images and note what you like and what you would like to improve on next time.
Black and white images can be very dramatic and in some instances can actually reveal a lot more about a subject than a color image can. With film photography you generally had to make a decision between black and white or color when loading your film. Yet another advantage of digital photography comes from not being bound to one or the other.
I rarely ever switch the settings on my DSLR to shoot images in black and white. That is not because I do not like black and white photography. Rather, the process to convert an image into black and white (or grayscale) in photo editing software such as Photoshop is so simple that I leave the camera alone and only convert those that I want in post processing.
Here are the simple steps for one method of converting a color image to black and white using Adobe Photoshop. Note that I said “one method.” That is because there are multiple ways to accomplish this. I feel this is the simplest and most basic method, but you can do multiple other things such as channel mixing and color desaturation as well. Also you are not stuck if you do not have Photoshop. There are plenty of other photo editing software programs that allow you to do something similar. My post from a while back on 5 free online photo editors is a good reference if you don’t have Photoshop.
Don’t blink, this is pretty quick:
Step 1: Open your color image in Photoshop
Step 2: From the Image>Mode menu select “Grayscale.”
And there you have it, two simple steps.

If you want to do a little more adjusting there are a lot of options for tweaking your new black and white image. Here are a couple you can play with after you have completed the two step process above.
1) Shadow/Highlight – from the Image menu select Adjustments>Shadow/Highlight. This feature gives you several options for adjusting your black and white image to get the effect you are going after. Experiment with different levels to get the shadows and highlights just right for your image.
2) Gradient Map – Again from the Image menu select Adjustments>Gradient Map. Select a black and white gradient and using the sliders you can adjust your black and white values. Make it a little more black or a little more white or varying gradients in between.
With digital photography you don’t have to shoot the images in black and white necessarily. The post processing options available allow for a wide range of creativity with your images.
So what exactly is RAW? Contrary to popular belief it is not a file format like JPEG or TIFF. The term RAW simply refers to a file that has had minimal or no in camera processing performed on it. When shooting under the standard or jpeg setting in your digital camera the processor takes steps to manipulate the white balance, contrast, sharpness, and color saturation based on the setting you have on the camera or automatically based on how the camera is programed. After doing so the files are compressed to some extent. RAW file formats vary from one camera manufacturer to another. My Sony Alpha for example uses ARW.
Here are a few pros and cons (as I see them) to help you determine if shooting in RAW is right for you.
PROS of Shooting in RAW
1) More control in post-production
When you shoot in RAW the camera leaves it to you to do the processing of the image. This means you have total control over the image in the post production process (think PhotoShop). All the adjustments you may want to make such as white balance, saturation, levels, contrast, curves, image size, etc. are available to do on the original unprocessed image. If you have some skills with a program such as PhotoShop this kind of control can be invaluable and leaves the creative power up to you, not the camera.
2) No loss of image data from the JPEG conversion process
When the camera processes the image into a JPEG file format part of that processing involves some compression and therefore loss of original image data. A JPEG is a lossy file type meaning some data is “thrown away” each time the file is saved to the JPEG format. You will lose color saturation, color range and sharpness. This is not the case with RAW since there is no in camera processing.
3) You will always have your “negative” to go back to.
Unless you delete it or save the original as another format your RAW file will always remain as the untouched/unprocessed original “negative” of your image. This allows you to go back to it again and again and make changes. You can try different techniques and adjustments to get the final image you want without ever losing that original RAW file data.
CONS of Shooting in RAW
1) Larger file sizes decrease the number of images you can fit on your memory card
Since a RAW file is not compressed like a JPEG it stand to reason that it will take up more space on your memory card. For example I use a 4 GB memory card. When I set the image format to a standard JPEG I can get 1512 images on the card, a heck of a lot. When I change the format to RAW, I can get 266 images on that same 4 GB card. That is still a lot, but it is 1246 less than when shooting in JPEG alone.
2) You have to have the appropriate software to open the file
Unlike a JPEG, which can be read and edited (to some extent) with the standard photo software included with most PC and Mac operating systems, RAW files require more advanced software to be read and edited. If you are already using PhotoShop that should not be a problem, but it something to keep in mind. You do not want to shoot for a day only to find out you can’t open the image files.
3) You need more room to store the photos
Based on #1 the larger file size of RAW images is going to require more storage space. Just as your memory card can fill up quickly so can your hard drive space if you shoot often. The space needed can add up even quicker if you are editing your images and saving the edited copies as well as the original RAW file (which you should). A 1.5 TB (that is terabyte) drive for under $200 can easily resolve that issue, but the more you shoot the more space you will need.


