
I have been trying to go beyond just taking a photograph and do some creative things with them. At the same time I am practicing my Photoshop skills and trying to expand them beyond the basics.
For this collage of images I went through all of my photos using the Adobe Bridge program and sorted images that were mainly blue into a new folder. This was harder than I thought since I decided to avoid pictures that were blue because of the sky. There were a lot of those, but I wanted the blue to come from the focus of the photo rather than the background.
Next I re-sized and cropped the photos so that they were each 2″ x 3″. I started making them 3″ x 3″ squares but this distorted too many of them so the rectangles worked much better.
Finally I arranged the photographs on a new canvas. It is not exactly expert level Photoshop work, but I was very happy with the result.
Now to find green photos…
After photographing the fireworks last week I decided to try some more night time photography. South Mountain in Phoenix is known for its sunset and city lights views. A short drive up to the 2600 foot summit gets you to a great lookout over the city perfect for photographing the sky and city below.

This was definitely a trial and error process for me as I am taking the camera off the auto mode and manually adjusting the settings. For this shoot I played with shutter speed to see what I got and hopefully learn something in the process. Ideally I should not be focusing on one setting in the “Exposure Triangle” and leaving the others to default, but I am trying one step at a time.
I got some fair pictures but better yet learned a few things in the process…
- As with shooting fireworks timing is everything. Lesson learned: get to the destination early enough (in this case before the sun starts setting) to stake out a good spot and get everything set up. For photographing city lights twilight is ideal rather than when the sky is completely dark.
- Tripod, tripod, tripod. My camera has image stabilization built into the body. But at slow shutter speed a tripod is critical. A remote would have helped too.
- Underexposure and overexposure are very easy to do. If I had adjusted the aperture and ISO as well as the shutter speed I’m sure I could have improved exposure greatly. Otherwise I need to experiment more to find a happy medium. Or there are some Photoshop tricks to adjust this after the fact. But I prefer to get it right without having to do too much editing.
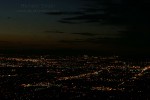
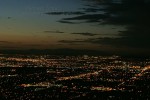
Original Image Corrected in PhotoShop
Click the images to see larger versions.
These photos are the result of playing around with some Photoshop filters on the same fire hydrant photograph taken at Chandler Gilbert Community College.
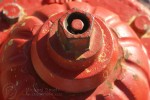
Original Version

Glowing Edges

Cut Out
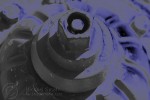
Neon Glow - Blue
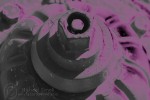
Neon Glow - Pink
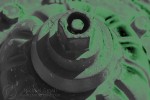
Neon Glow - Green
Click on the images for a larger version.
Since photos float around the Internet rather easily nowadays and many people consider it “free for the taking” if it is posted online, I thought this tutorial I ran across might be useful to share. It requires some basic Photoshop skills but the how-to is well written and pretty easy to follow.
Batch Watermarking & Adding Copyright with Photoshop
I have taken one Photoshop class and do not use it too much on my photography other than to fix a few distortions or remove red eye. But there is so much you can do with it and I like playing around in it. Learning more about Photoshop and practicing on my photos is definately on my to-do list.
I stumbled upon this great site with Photoshop tutorials. The one I am starting out with is 50 Great Photoshop Tutorials for Clever Beginners. It gives step-by-step tutorials on 50 different things you can do with Photoshop. I will post the results as soon as I get some results that I am happy with.


