I was in San Diego last week and wanted to try some more night time photography. Since one of my favorite subjects in architecture I thought the historic architecture at Balboa Park would be a good place to try out some long exposures and see what I could get. Many of the buildings, especially those along the El Prado walk, are well lit at night. Their Spanish style architecture makes for a great subject against the dark night sky.
Before I get to the photos, here are a few things I learned that are key to producing good night photography:
- It is very difficult to do without a good tripod. The one I had at the time was broken and would not extend all the way up. Crouching down to try to see through the view finder is both uncomfortable and makes getting a good shot harder. (But my new Induro AB2 has since arrived. I am anxious to try it out and will let you know how it goes.)
- In addition to the tripod, a shutter remote is an invaluable tool to help avoid camera shake. They can be found online for very little money.
- Take a flashlight, or some source of light. I did not and it would have been very helpful for seeing the tripod’s level and camera settings.
- Experiment with different shutter speeds and apertures. Take the camera off automatic. I am working with digital photography so the cost of film and developing are not an issue. Take as many as you need to get the few good ones.
- Watch a tutorial video such as this before you go out shooting. I didn’t, but it would have been helpful.
Casa del Prado Theater
Exposure Program: Manual
f stop: f/5.6
ISO: 100
Focal Length: 50 mm

Casa del Prado
Exposure Program: Manual
f stop: f/5
ISO: 100
Focal Length: 20 mm

Botanical Building
Exposure Program: Manual
f stop: f/5.6
ISO: 100
Focal Length: 55 mm

I realize I am late to the party – and far beyond fashionably late. But I have recently discovered Twitter. Well, I of course knew it existed; I just never really understood it and could not imagine how it might be useful to me. FaceBook has provided me with all the play by play updates of my Internet circle that I needed.
But I can now say “I was wrong,” and the usefulness of Twitter is becoming more and more clear to me. Although I am pretty certain that I have not even scratched the surface as to all it potentially has to offer. But I can see it looming…
My recent venture into Twitterdom got me to thinking about how Twitter and other bits of the Internet can help me improve my photography and get a better understanding of the fundamentals and techniques of photography.
So here are my Twitter and General Internet Tips for improving your photography skills (I am sure these can be expanded, to some degree, to any hobby or obsession):
It is all about the Who!
With Twitter, who you are following and subsequently who is following you is critical. It is easy to get carried away and start following people willy-nilly. I have gotten off track already, but the majority of those I follow are related to photography or design.
Read, Read, Read
I didn’t make this connection at the beginning, but what better way to expand my photography knowledge than to surround myself with others that do what I do. It can get addicting and a bit daunting to try to keep up with all the twitted information. But in just a few days I have already found so many resources and sites and bits of information on the web that I would not have stumbled upon on my own just by reading the tweets of people involved in what I am interested in, photography.
Use Your Tweeps
Don’t just read what everyone else is posting. Contribute. Post your photos and ask for feedback (or don’t ask, but someone is bound to offer it anyway). Ask questions, inquire. Most of these people are twittering because they have something to say (although some have way too much to say and some a lot of nothing to say) and enjoy saying it. Try posting your latest shot with TwitPic and see what advice or critiques people offer.
Beyond Twitter
Forums are a great way to connect to other people that share your interests. No matter what you are into there is certainly a forum out there focusing on it. I came across my first forum through Twitter. I just started using it but so far I got some suggestions for a new tripod and have a photography assignment I’m going to try.
Flickr is another great way to share your work with your fellow photographers. There are more groups than you could ever explore. Find a few that are common to your interests and share some photos. See what people say and what advice they offer. Be sure to offer the same advice to others that post.
After photographing the fireworks last week I decided to try some more night time photography. South Mountain in Phoenix is known for its sunset and city lights views. A short drive up to the 2600 foot summit gets you to a great lookout over the city perfect for photographing the sky and city below.

This was definitely a trial and error process for me as I am taking the camera off the auto mode and manually adjusting the settings. For this shoot I played with shutter speed to see what I got and hopefully learn something in the process. Ideally I should not be focusing on one setting in the “Exposure Triangle” and leaving the others to default, but I am trying one step at a time.
I got some fair pictures but better yet learned a few things in the process…
- As with shooting fireworks timing is everything. Lesson learned: get to the destination early enough (in this case before the sun starts setting) to stake out a good spot and get everything set up. For photographing city lights twilight is ideal rather than when the sky is completely dark.
- Tripod, tripod, tripod. My camera has image stabilization built into the body. But at slow shutter speed a tripod is critical. A remote would have helped too.
- Underexposure and overexposure are very easy to do. If I had adjusted the aperture and ISO as well as the shutter speed I’m sure I could have improved exposure greatly. Otherwise I need to experiment more to find a happy medium. Or there are some Photoshop tricks to adjust this after the fact. But I prefer to get it right without having to do too much editing.
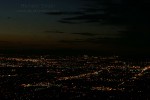
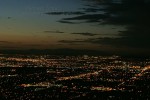
Original Image Corrected in PhotoShop
Click the images to see larger versions.
 This post is by no means a “how to” on photographing fireworks. For that, do what I did and read “How to Photograph Fireworks Displays” from the Digital Photography School. They are a great resource with a lot of good advice and tips.
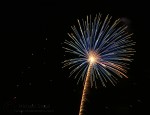
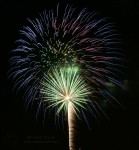
 I attempted photographing fireworks for the first time last night, the Fourth of July. I was happy with a few of my shots, but that is a few out of 135. Here are some of the tricks I picked up from DPS’s post and trial and error while out shooting last night.
Location, location, location. Scout out a good location to set up early. If you are too far away you are not going to get good photographs unless you have a really good telephoto lens . Also keep in mind you are going to need someplace to set up your tripod.

Timing is everything. I do not have this mastered yet, but it takes some practice to know just when to hit the shutter button. Too early and all you get is the trail of the rocket going up (like this one). Too late and you get a nice shot of smoke. I found that after watching a few rockets you can anticipate what the half way point is between being launched and exploding. That seemed to be the best time to hit the button.
Experiment. Photography is all about trying different things to get the shot you want. This was especially the case with photographing fireworks. Here are some of the things I tried (some worked and others didn’t):
- Shutter speed – I started out at 5 seconds and tried various speeds down to 2 seconds. I think somewhere between 2.5 and 5 worked best for me.
 Aiming the lens – It is very hard to know exactly where to aim into the dark to get the shot you want. I found aiming in the direction of the fireworks display and then tilting the camera on the tripod slightly up and down to keep the show in frame worked fairly well. Sometimes I missed.
- Focus – How do you focus on something that is there for only seconds and you can’t touch the camera? Not easy to do, but I used the manual focus (keep auto focus off for this) and focused on something in the direction of the show and then left it alone.
- Aperture – I read that an aperture range of f/8 to f/16 works best for fireworks photography. So I trusted the experts and did not experiment with this setting leaving it at f/8.
Equipment. There are a few essentials that will make photographing fireworks much easier. First, a tripod. It is critical to fireworks photography to keep the camera steady. No matter how unnerved you are or how steady handed, no one can keep the camera absolutely still at the longer shutter speeds. Second is a shutter release cable or remote. This is a great tool when taking pictures with long shutter times. It allows you to keep your hands off the camera completely eliminating any movement. A self timer could also work, but you need to be very good at your timing since you need to set it to go off right before the explosion which is hard to anticipate.
Keep Shooting. The great thing about digital photography is that it costs the same to shoot 10 photographs as it does 100. So in the case of something like a fast action fireworks display just keep shooting. You can sort through the photos later to eliminate the ones that did not work and Photoshop as necessary.
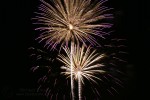
 I suppose a little shameless self promotion never hurt. I have had my first photograph published by someone other than myself (and not a friend or family). I have a Flickr account where I post many of the same photos I put on shuttermike.com. The other day I got an email through Flickr from a company called Schmap.com saying they selected one of my Tucson photos for the “short list” to be in the next edition of their Tucson Guide. Then today I got another email from them saying they had selected the photo and it was now published in the new Tucson guide on schmaps.com. Pretty cool.
Located on 7th Ave. in Phoenix, the First Christian Church was designed by Frank Lloyd Wright in the early 1950s. But it was not built until after his death in 1971.
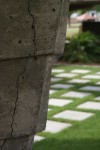
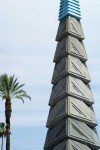
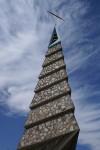
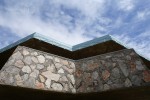
Click on the images to see a larger version.
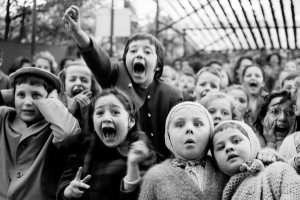
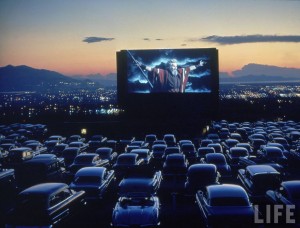
This is a cool web site that is easy to get lost in for hours. It is a collaboration between Time Life and Google to catalog and digitize the entire Life photograph collection. You can search or just browse through the entire Life archive (10 million plus images once the project is complete).
Here are some of my favorites.

Sony Alpha 100 DSLR
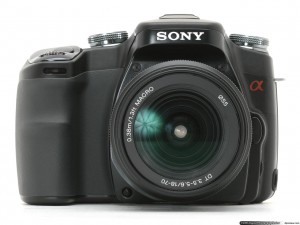
A quick post on the camera I am using for most of the photos on this blog. It is the Sony Alpha 100 Digital SLR. They have come out with the 200 series since I bought this, but I have not had the need to upgrade just yet.
One of the main reasons I decided on this camera, aside from the good reviews, was that it was compatible with the lenses from my Minolta film SLR camera. In addition the Super SteadyShot image stabilization is a great feature.
The picture quality is excellent and it is a great camera overall. No complaints here.
Here goes nothing… Welcome to my photo blog. The intention is just to post my photography for all the world to see and critique. I am still working on the layout and theme of the blog itself. I hope to start getting photos up soon.


