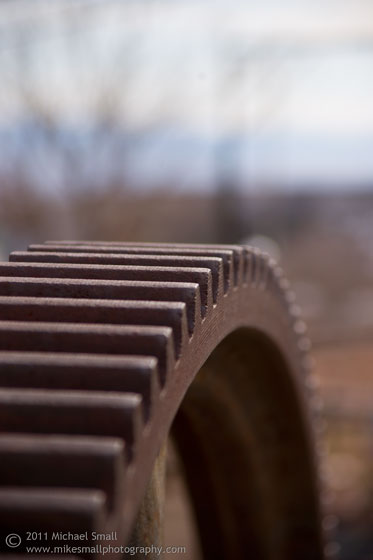
If you’re not familiar with an extension tube or haven’t used one it is worth the relatively small investment to get some and see what you can come up with. There are several brands and mounts available for all the major brands (Canon, Nikon, Sony). Check out extension tubes on Amazon for some of the better deals.
The basics: An extension tube is a lens accessory that is attached to the lens mount of the camera at one end and to the lens itself at the other. The tube has no optical element in it and it may or may not have and electrical contact. Those with a contact can retain the auto focus of an AF lens (but at a bit more cost) while those without the contact convert an AF lens to manual focus. By adding an extension tube between the camera and lens it allows you to move the lens further away from the camera. By doing so it allows the lens to focus much closer on an object resulting in objects smaller than the sensor still filling the frame. So they are ideal for macro photography and could eliminate the need for a specialized macro lens.
These photos are of my dog Rylee, a very good model.


First a disclaimer, the subject matter of these photos is not really relevant to this post. The important thing is the light and the shadow that it casts for the purposes of this post.
I am not an expert on flash photography and generally avoid it when I can. But when done right, flash can play a very important role in your photographs. So I have been studying up on flash and lighting in general in an attempt to incorporate it more into my photography when appropriate.
I did a little experiment with a speed light (flash) to try out a few different techniques.
The first photo is using a direct flash. It is off camera (triggered with a transmitter and receiver ) and pointed directly at the subject. This method lights the subject, but it is a harsh light and the shadows created on the wall almost distract from the subject.

Direct Flash
Next I used a 40″ shoot through umbrella (which can be had for a relatively small investment). By placing the umbrella in front of the flash you are changing the light from the more harsh direct light seen in the photo above to a less direct light that wraps around the subject. In my case I changed the flash from the 2 to 3 inch direct light to a 40 inch light with the use of the umbrella. (Umbrellas come in a range of sizes from 30″ to 60″ and sometimes larger.) The resulting photograph still has a shadow, but notice how different it is from the first photo. The shadow is softer and less prominent.

Flash using a shoot through umbrella
Finally I pointed the flash at a wall that was perpendicular to the wall behind the subject. This allows the flash to bounce off the wall and wrap around the subject. You can change the size of the flash by moving it closer to or further from the wall you are bouncing it off of. Int he case of the photo below it was about 3 feet from the wall. This resulted in basically no shadow at all. (Note, the flash should have been moved to a different angle to get better light directly on the subject itself).

Bounced Flash
The conclusion, you need to light your subject with whichever technique works best for you and the look and feel you are trying to present. But to eliminate harsh shadows bouncing the flash or using a shoot through umbrella can be beneficial.
 Narrow
f/7.1 – 1/250 sec – ISO 200 – Focal Length 160 mm
The “narrow” in this instance is in reference to the depth of field used in the photograph. The part of the image that is in focus is a very small (narrow) portion while the rest of the image is blurred out.
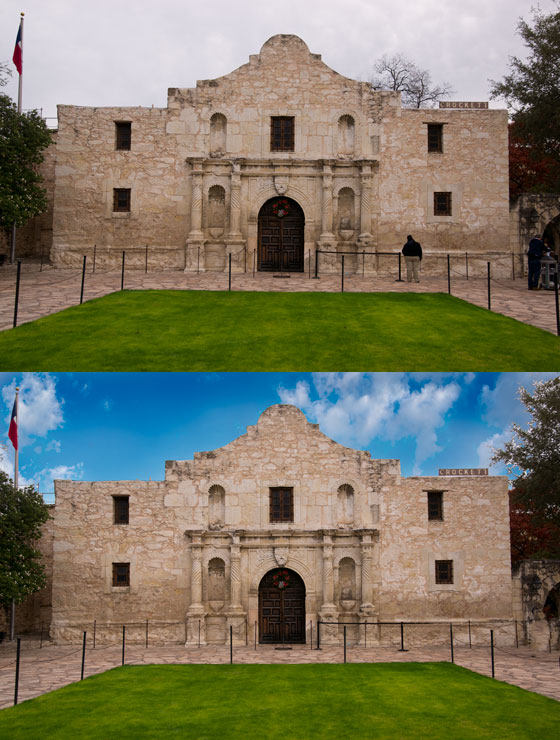
Ideally in photography you will compose your image, wait for or create the right lighting and have a lot of patience until the subject is just as you want it. But sometimes time is not on your side and things don’t go your way in photography and the world’s lack of cooperation results in a less than ideal photograph. That is where a little post-processing trickery can come in handy. Yesterday’s Photo of the Day of the Alamo did not look like that when I started. The weather was not cooperative while I was in San Antonio so I had cloudy, gray skies for three days. but even if you had a perfect sky day there are other things that can become an unwanted distraction in your image. For crowded tourist sites such as the Alamo people will probably be your biggest challenge. But with a little PhotoShop magic gray skies c an be blue again and unwanted photo intruders can disappear.

My first attempt at photographing star trails was not a total loss. I did not get the images I was hoping for but I did get some images that were acceptable and a good list of lessons learned for attempt number 2 (and 3 and 4 and 5…).
First the basics, what is star trail photography? A star trail photograph is one in which you capture the motion of the stars as the earth rotatesby using long exposure shots. The trail of light you see in the image is the star at various points in the night sky as time passes and the earth moves. In my image above I got the start of the concept. But most star trail photos you see will have significantly more movement, i.e. longer trails, of the stars. So for next time I have a few pointers.
1) The darker the sky the better. That means you are going to need to head away from metropolitan areas and the light pollution they emit. I also shot this three nights before the full moon which resulted in too much moon light to get optimal star trail images. So drive out into the desert or country away from the city lights and consult a moon calendar before you go to make sure you have it as dark as possible.
2) No exceptions, you are going to need a tripod for this. Hand holding will never work unless you have the steadiness of a rock for very long exposures. But why risk it, take your tripod.
3) Focusing can be a bit tricky with photography in environments that are this dark. If you can focus manually that is good. Alternatively you can focus on something that is lit enough to see in the distance with auto focus then switch the camera to manual focus and aim the camera in the direction you plan to shoot. Don’t do your star trail photography in the direction of the light source. This will lock int he camera set auto focus and maintain it as long as you don’t change the focal length.
4) Camera settings: You will want to experiment here and find what works best for the setting you are in, but in general these are the settings that I found worked for me.
- The lower the ISO the better to prevent noise (100 is best)
- An f/stop in the range of 2.8 – 4.6 worked well for me
- Set white balance to auto
5) Composition: Composition was a bit of an after thought my first time out photographing star trails. But it shouldn’t be. This is a matter of personal taste, but I think having something in addition to the night sky in your composition really enhances it. That could be a building, trees (be careful of windy nights where a tree can blur in a long exposure) or a mountain or hill the distance. Make sure you pick something that is going to hold relatively still during your long exposures.
6) For the actual photographs you have two options. Really long exposures using bulb mode or multiple long exposures. I tried both and found that the bulb mode exposures did not work well for me. I was getting too much noise and light interference. If I had had a darker night that might not have been an issue. But in this setting I found that the multiple long exposure method worked better. To use this method:
- Set your shutter speed to 30 seconds.
- Set the drive mode (as it is called on my Sony) to continuous. Might be sports or action mode on some cameras.
- Connect a remote shutter release cable and after you click it once lock it so that it stays held down. This will allow the camera to continually take 30 second shots one right after the other.
- The number of shots you will need depends on how long you want your star trails to be. I would recommend at least 5 minutes, which is 10 shots. But the longer the better.
- DO NOT MOVE THE TRIPOD OR CAMERA. This will ruin things for the next step.
7) Processing the images. Once you have 10+ images you are going to need to combine them into one to make the final image. There is a free star trail software program you can download that does a really good job of stacking your images and giving you a JPEG or TIFF file.
8) A few extras to bring along that can help.
- A flashlight
- A chair, you are going to want to be comfortable while you wait for these long shots.
- Extra charged batteries. Long exposures like these can really drain your batteries. Be prepared.
- A guide to the stars. You might want to know what you are photographing.
- A jacket. It can get cold out in the middle of nowhere at night.
- A friend. It can also get lonely and scary out in the middle of no where at night.

So now I think I am ready to head out to the desert again and try my hand at star trail photography once more. The next new moon is towards the end of the month according to my moon calendar and I am ready with what I learned this first time around. Check back for attempt number two.
I have lived in Arizona (almost) all my life and I am sorry to say I have only been to the Grand Canyon once (and that was over 20 years ago as a kid). I know, I should be ashamed of myself being a photographer with this “hole in the ground” in my back yard and not taking full advantage of it. It is on my 2011 Photography Resolution list to get to the Grand Canyon sometime this year to photograph. So Outdoor Photographer magazine’s recent article by photographer George Stocking is a great inspiration to me. 10 Tips For The Grand Canyon offers the insider tips of a great landscape photographer and is well worth a read even if you don’t have any immediate plans to visit the Grand Canyon.
Night time photography can be a bit tricky. It requires a bit more thought and equipment than daytime shooting. But with some practice you can easily get the hang of it and the benefits are well worth the extra effort and time. So I have put together a short list of night photography tips that I have picked up along the way to help you out when shooting after dark.
- Always (always) use a tripod. The settings necessary for good night time photography do not allow for hand holding the camera.
- Use a low ISO (400 or less). This may sound counter-intuitive since a higher ISO is generally used for low light situations. But if you are following tip #1 above you can keep the ISO low and compensate for the low light with aperture and shutter speed thereby keeping noise to a minimum.
- Set your aperture to f/5.6 – f/8.0. This is obviously going to depend on your exact lighting conditions but this is a good rule of thumb and starting point.
- Use l0nger shutter speeds. With the low ISO and aperture int he f/8.0 neighborhood you can get the proper exposure through keeping the shutter open longer. Experiment with different shutter speeds to get your ideal exposure.
- Keep the anti-shake off. When you camera is on a tripod this feature is not necessary and the camera might actually try to compensate for shake that is not there.
- Use a cable release. The less you touch the camera directly the better. Event he act of pressing the shutter could be enough movement to blur the image.
- After framing your shot close the eye piece cover to prevent light from getting in. Since you will not have your eye against the eye piece during these long exposures you want to use another method to keep the light out. Most cameras have either a cover you can place over the eye piece or a little “door” that closes over it.
I came to the HDR (High Dynamic Range) photography party late. Before I really understood what HDR was all about I saw so many photographs processed using the “grunge” and “painterly” settings for HDR and I thought they were just too over-processed for my taste. So I associated all HDR with those looks. But after I started playing around with it I realized there were so many more options. Also, for architectural and real estate photography HDR can save an image by allowing you to expose for both the light and dark areas of your subject and then merge them into one perfectly exposed image. There is still room for artistic interpretation as well and if the grunge or painterly or another custom processing of your image works then that is great too.
Here are two images to give an idea of what you can do with HDR photography versus processing the same image in PhotoShop.

This is the PhotoShop edited photograph. I did not do much here but I did increase the vibrance and saturation a bit and lightened the image overall. This is not a bad image in general. But the sky is very dull and the shadows in the lower left corner are a little dark.

This is the HDR processed version of the image above. It is a combination of three exposures of the same scene; one exposed normally, one over exposed and one under exposed. This is the essence of HDR photography in that it allows you to correctly expose for all areas of the scene with different shots and then merge them all together. This image is not perfect either; the saturation could be toned down a bit and the patio furniture has lost its true color. But those things are easily corrected and it is more a matter of personal taste. What is more important is the sky and the dark areas. I was able to expose for the sky alone in one image and capture the blue hues and the glow of the late afternoon sun. The shadows on the back wall and around the rocker are also now gone.
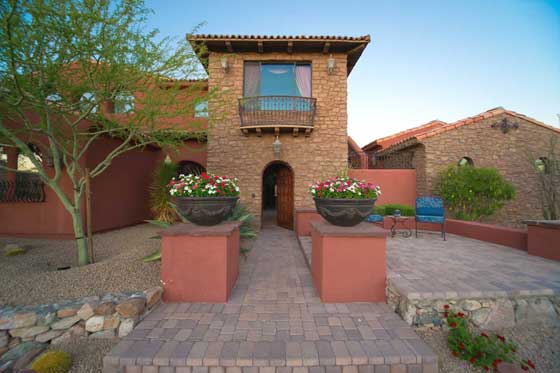
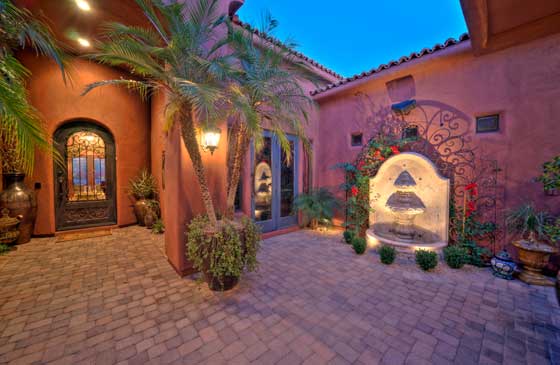
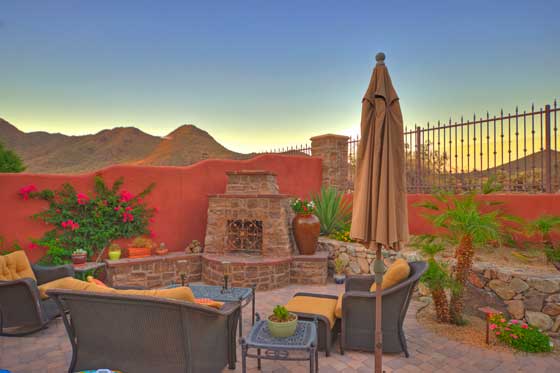
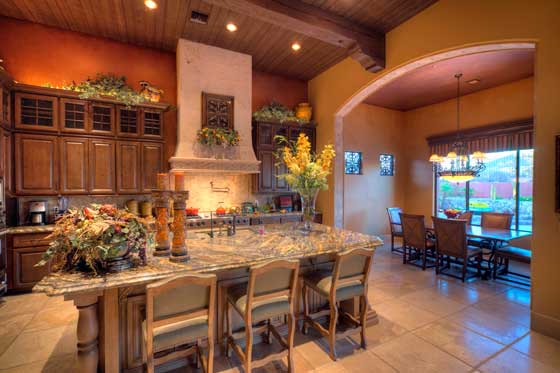
I have been dabbling in real estate and architectural photography lately as well as HDR processing. It is not as easy as it may appear to get the perfect shot of real estate. So practice is essential. A friend of a friend was kind enough to let me practice on their beautiful Scottsdale home recently. Here are a few of the shots after I processed them through Photomatix Pro 4.0.2.


on Amazon for some of the better deals.


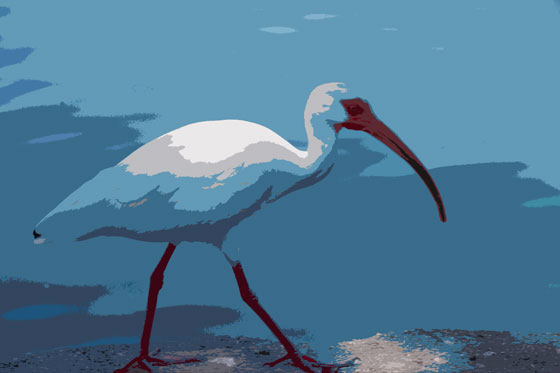
 Narrow
f/7.1 – 1/250 sec – ISO 200 – Focal Length 160 mm
