15 Mar 2011
What is a Focus Screen for a DSLR Camera?
Architectural Photography, Photo Equipment, Reviews 1 CommentOne problem I have had with my photography, that I have never quite been able to correct no matter how much on concentrate on it before clicking the shutter, is a slightly skewed image. My horizon is just slightly off at an angel. I am not sure if I ever so slightly shift the camera when I click or if I never get it perfectly straight to begin with. But whatever the cause it has resulted in me having to go through the additional steps in PhotoShop to rotate the image and then adjust or crop of the extra white space this causes around the edges. It is not a big deal, but a minor frustration that I was not sure how to correct until recently.
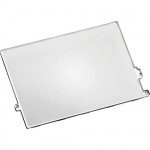
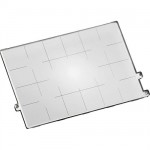
I was reading Adrian Schulz’s Architectural Photography(side note: this problem can be particularly noticeable in architectural photography because the horizon and parallel lines in the structures are so important to the overall image) and he mentioned a device called a “grid screen” (or focus screen) – page 37 if you’re interested. In the simplest terms, the focusing screen is the piece in the camera that allows you to view what the lens sees through the view finder. They are often etched with lines or guides that are then visible as an overlay on top of the image as you view it through the view finder. I had known that some cameras had grid lines when you look through the viewfinder to help with composition (think rule of thirds). But I did not know that on many DSLR cameras the focusing screen was interchangeable. But a quick search on my favorite camera supply site, B & H Photo, revealed that for my camera, the Sony Alpha 850 DSLR, the focus screen was indeed interchangeable and a grid version was available.
For just over $30 (free shipping too) I ordered the Gridded Type L Focusing Screen. (Note: I have seen these for as much as $56 elsewhere – yikes) This is such a simple solution to the tilted image problem I was having I cannot believe I never came across it before or did not search it out. But once I switched out my standard screen with the gridded screen I instantly had multiple points to reference to make sure everything lined up just right before I click the shutter. Is it a crutch? Maybe, but I look at it more as a tool to help me do my job better -a “work smarter, not harder” thing.
I do have a few tips on installing one of these based on my own experience.
1) Steady hands are important. The screen comes as a kit with a storage case and a specially designed tweezers to remove one screen and install the other. But they are tiny parts and you have to be very careful not to touch the mirror or the sensor in the process. So no coffee immediately before the operation.
2) Make sure you are doing the switch in as clean and dust free of an environment as possible. For one you are working on your camera with the lens off so you wan tot keep dust off your sensor. And two, anything that gets on the focus screen will show in your view finder. I peak from experience here. I had to do this twice because I got a speck of something on the screen and although not on the images it was very obvious through the view finder.
3) Watch the very detailed and well done video below. It is for making the switch in a Sony Alpha 900 or 850 but there are similar videos out there for Canon, Nikon, etc.


Bryan
on December 3 2013
Excellent. The best instructional video I’ve seen. Clear and concise